
How to Create a Django Project in a Virtual Environment

In this article, we show how to create a new django project in a virtual environment.
If you're building multiple websites and you have them on the same computer, they may require different Python modules, including different versions of the same module. Or else, the project may fail due to incompatible modules.
So knowing how to separate the various projects from each one is crucial to the functioning of the websites.
Virtual environments allow for complete separation of django projects from each other.
Therefore, you do not need to worry about module incompatibility between projects.
So in order to create a virtual environment for a django program, you can go to the Python folder that normally houses the normal
programs that you run in Python, and there you simply create a folder that will serve as your parent directory for the django project. You can
call this anything. In this case, we will call it 'mywebsite'. This is done by the line below.
So we create this directory within our Python directory.
Next, just make sure that you have virtualenv installed. This can be installed by the following line below.
With this directory now created, then move into it with the cd command.
Now within this folder, we create a virtual environment, which we will name venv.
After you run this command, if you look into the folder, you should see a venv directory.
This venv directory has a Scripts directory. Inside this Scripts directory are 2 important .bat files
named activate.bat and deactivate.bat

These are important, as they allow us to activate the virtual environment or deactivate it.
We will see how to do both in this article.
So the next thing we need to activate the virtual environment.
This is done by running the activate.bat file, which is done through the following line of code below.
You will know that the virtual environment is activated when you see (venv) all the way to the left.

You know this is a freshly created virtual environment when you run 'pip freeze' and get no
modules returned.

This signifies that no modules have been installed yet in this virtual environment.
Now to install a Python module in this virtual environment, make sure that it is activated and then go into the Scripts directory of the venv directory.
This module contains the pip.exe and pip3.exe files needed to install new modules.
So let's install django in this virtual environment through the line, pip install django.
If you need a specific django version installed, then you specify this here.
Once this is executed, we now have django installed in our virtual environment.
With django installed, we can now start a django project in the virtual environment. This is shown below.
It is important to note that your django project cannot have the same directory name as the parent directory that you created for the virtual environment.
So while you may call the parent directory mywebsite, you have to specify another name for the django project, such as mystore, or even something more descriptive such as the name of the website.
In this example below, I simply call it 'mystore'.
You specify this command within the Scripts directory of the venv directory.
Now you must go into the mystore directory (or the name you created) by using the cd command.
Now within this directory, you should see the all important manage.py file, which allows us to run many essential commands in djagno.
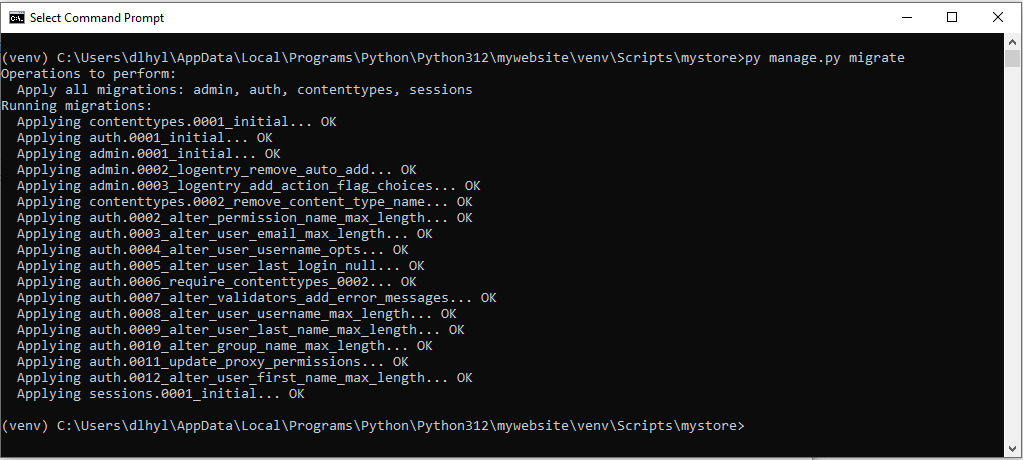
The first command that we will run is the command to initialize the database.
If you run this command, you should see a series of migrations performed.
Now we can see if this website runs.
This is done through the following line.
This allows our website to run on our local server through
going to a browser and typing in 'http://127.0.0.1:8000

Now if you go to a browser and type in 'http://127.0.0.1:8000,
this brings us to the following output shown below.

If you want to take it a step further, you can create your own custom home page.
Related Resources
How to Randomly Select From or Shuffle a List in Python