
How to Download a New Boot Image to an SD Card in Windows
In this article, we explain how to download a new boot image (firmware image or disk image) to an SD card in the Windows operating system.
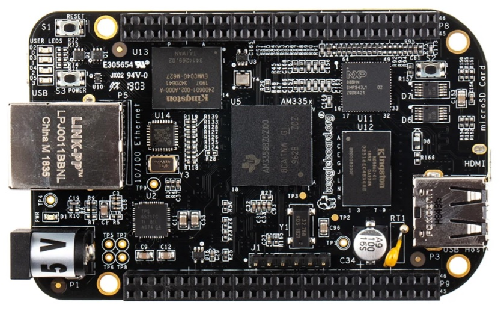
Downloading boot images to SD cards is important if you want to boot an operating system from an SD card or if you want to flash the eMMC memory of a board with the SD card, as is often done with Beaglebone boards for debian linux operating systems.
The first step to downloading a new boot image is to obtain this new boot image.
Let's say, for example, you want to download the latest debian operating system for your beaglebone device.
You can go to the following page, https://beagleboard.org/latest-images, which has many of the most recent firmware images for the debian operating system which are compatiable with various beaglebone boards.
So, if you click on one of the various operating systems, you will notice that it downloads the item with .XZ extension.
This is a compressed file type that needs to be extracted in order to be useful.
What we really want is a Disc Image File (.img). This is the type of file from which we can boot the linux operating system.
In order to extract all the files from the .XZ file in the windows operating system that you download from the beagleboard.org website, you can use software such as 7-Zip or WinRar.
Once you have the image file, then you will need to use another software which can write this image file to the SD card.
In Windows, one very popular software to do this is the Win32 Disk Imager software.
If you don't have this on your computer, you can search for it on a search engine and download it.
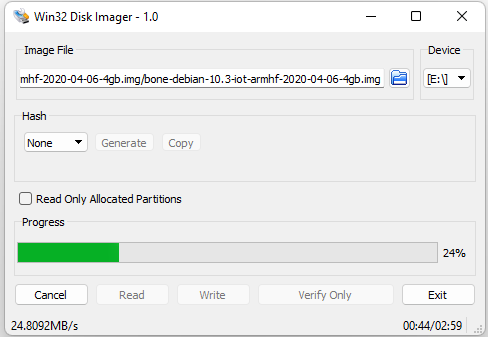
This software is displayed below.

This is how the software looks.
Make sure that when you use this software, you select the correct device to write the boot image to, which in this case should be the SD card.
Writing to a wrong device will erase the data on that device, so be careful and know which device you are selecting.
Click on the folder icon and select the boot image that you want written to the SD card.
After this, press the Write button at the bottom.
Writing the boot image to the SD card can take a few minutes.
After the whole process is done, you should see a message appear on the screen
stating, Write Successful
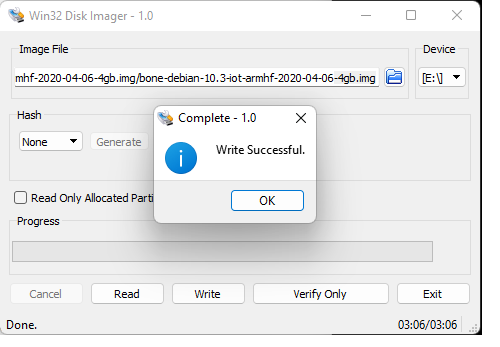
This means the boot image has been successfully written to the SD card, and the SD card can now be used to boot the operating system.
You can now boot the operating system on a device such as a beaglebone board from this SD card. You can also flash the eMMC of a beaglebone board so completely place a new operating system in its memory.
And this is how to download a new boot image to an SD card in the windows operating
system.
Related Resources