
How to Generate Your Own SPL, MLO, and U-Boot Image Files for a Microprocessor Device
In this article, we will show how to generate your own SPL, MLO, and u-boot disc image files for a microprocessor device such as a beaglebone board or a raspberry pi board.
These files can be used to boot U-boot, which can then boot a linux kernel.
We will show how with the U-boot source code, we can generate our own SPL, MLO and u-boot disc image files.
Why would we want to generate our own u-boot disc image file?
Because we may need to customize the U-boot source code in some way that makes it suitable for what we are doing.
An example is we want to be able to boot a zImage instead of a uImage to boot a linux kernel.
In order to do this, we may have to modify the U-boot source to make this possible.
Reasons such as this is why you want to be able to generate your own u-boot image that you can use with a microprocessor such as beaglebone.
So the first thing to do to make this possible is to download U-boot source code to your linux operating system environment.
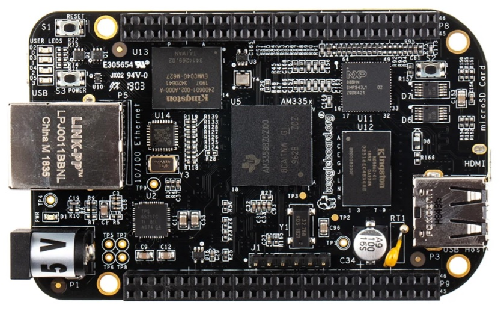
A Beaglebone board works very good with linux operating system, so using the linux operating system, whether in hard drive or virtually, facilitates working with u-boot.
The following is a link that contains the source code for various versions of U-boot: U-boot Source Code Files
So what you want to do is download one of these u-boot source files to your linux operating system, because we're then going to use these files to generate our own SPL, MLO, and u-boot disc image files.
For this project, download the file, u-boot-2019.01.tar.bz2.
After you download it from the internet, it will likely be in the Downloads folder on your linux system.
You will have to extract or uncompress this folder.
This you can do in the linux terminal.
This can be done with the following code shown below.
Or you can manually extract the files, clicking 'Extract here'
Both achieve the same result.
Once you have this, you should see the u-boot folder contain various folders and files, such as that shown
below.
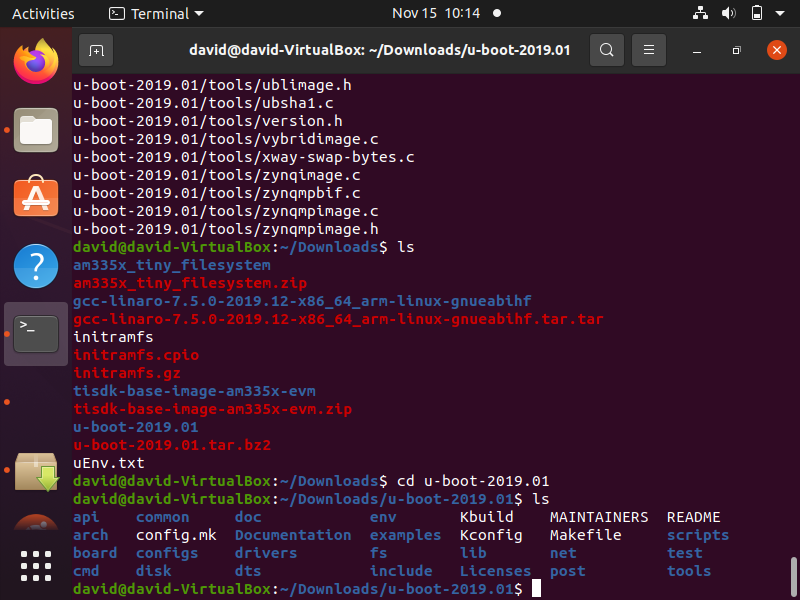
Ok, so we have the u-boot source code files that we are going to use.
Next, we need to download the arm cross compiler toolchain.
What this allows for us to do is to create u-boot disc file images for our target architecture, which in this case is arm.
We have an entire article dedicated to how to install an ARM cross toolchain
Once you have this ARM cross toolchain, you will have the main software element needed to do tasks such as creating u-boot disc image files.
However, you will need other software modules installed in order to make custom SPL, MLO, and U-boot image files.
You will want gcc to be installed on your system.
This is done through the following code shown below.
After gcc is installed, you will have to make sure that you have a software module named bison installed.
This is done through the following code shown below.
After you install the bison module, you will need to install a module named flex.
This is done through the following code shown below.
One last software module that is needed is either ncurses-devel or libncurses-dev, depending on the system you are running on.
For ubuntu, this should be libncurses-dev.
This software module can be installed through the following code shown below.
This module allows a graphical user interface to be shown when working with certain configuration changes for u-boot.
Now we should have all the modules that we need installed.
Next we go through the process of taking the u-boot source code and creating the SPL, MLO, and U-boot disc image files that we can use to run u-boot on a microprocessor such as beaglebone or any other microprocessor board.
So the first thing we have to do is perform a distclean of the u-boot source code. This deletes all the previously compiled/generated object files.
We do this through the following line below.
Again, this will remove all previously compiled/generated object files, giving the u-boot source code a clean slate for newly generated files.
This is shown below.
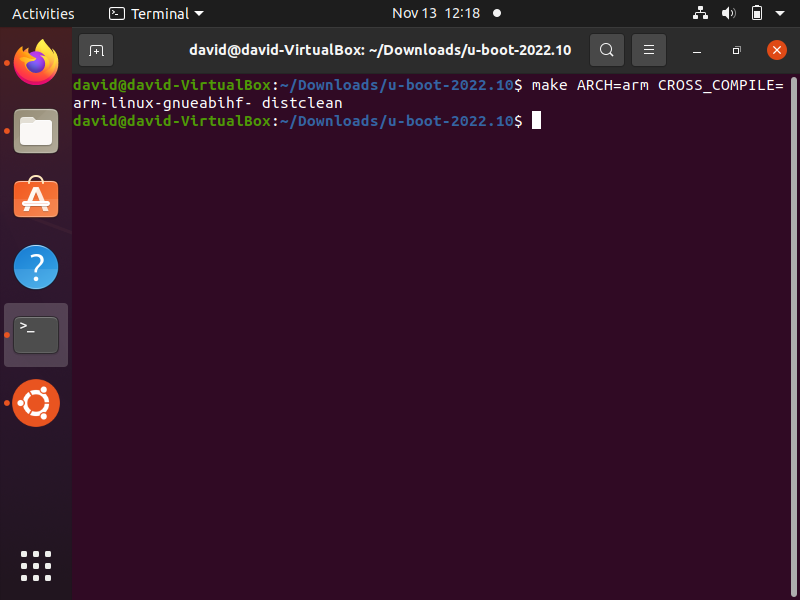
If there are no files to purge, then you will simple see nothing. If you previously created your own SPL, MLO, and U-boot image files, there would be a purge of files, which will be listed. Since we are performing this for the first time, there is nothing to purge.
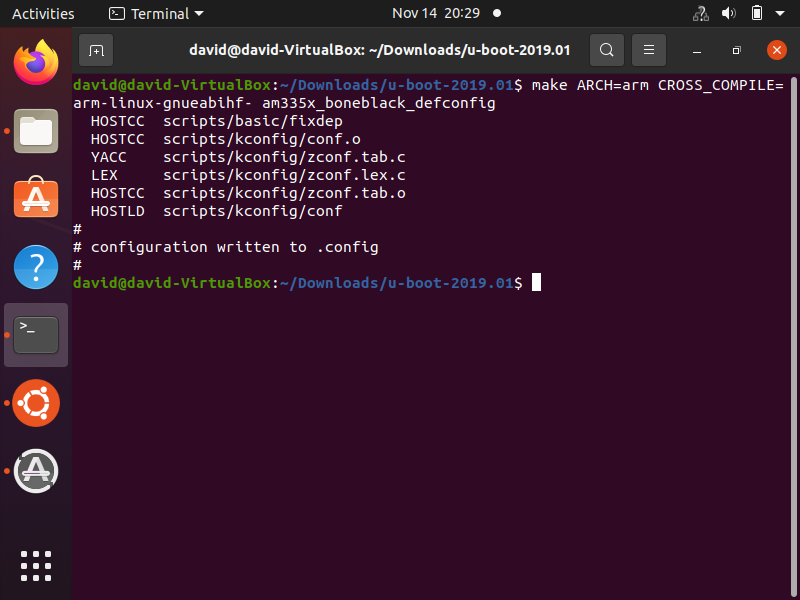
Next we must apply the board default configuration for u-boot. This is for whatever board we are using. So if you are using a beaglebone black board, then you would specify the configuration file for the beaglebone black board.
For the beaglebone black board, the configuration file is named, am335x_boneblack_defconfig for most u-boot source files.
So the line we must specify in the terminal is shown below.
This specifies to u-boot which board configuration file we need to use, which obviously must match the board you are using.
The result of this command being run is shown below.
You can view this configuration file by entering in the line of code shown below. Just make
sure you're in the root of the u-boot source directory.
When you run this command, you will be directed to a file such as that shown below.
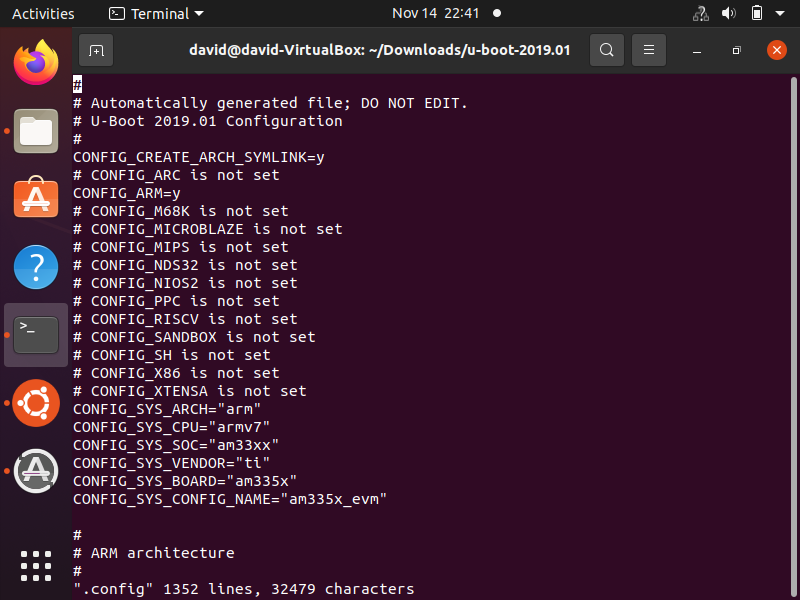
This is only for viewing the configuration file, but do not edit the file manually this way. This is discouraged.
If you want to edit the configuration for u-boot, then type in the following command
below. Just note that before, you run this command, if you are using a virtual operating system, it must be
in full screen mode, as the menu needs sufficient screen space in order to run; otherwise, it will
not and will display an error.
This will show a menu such as that shown below.
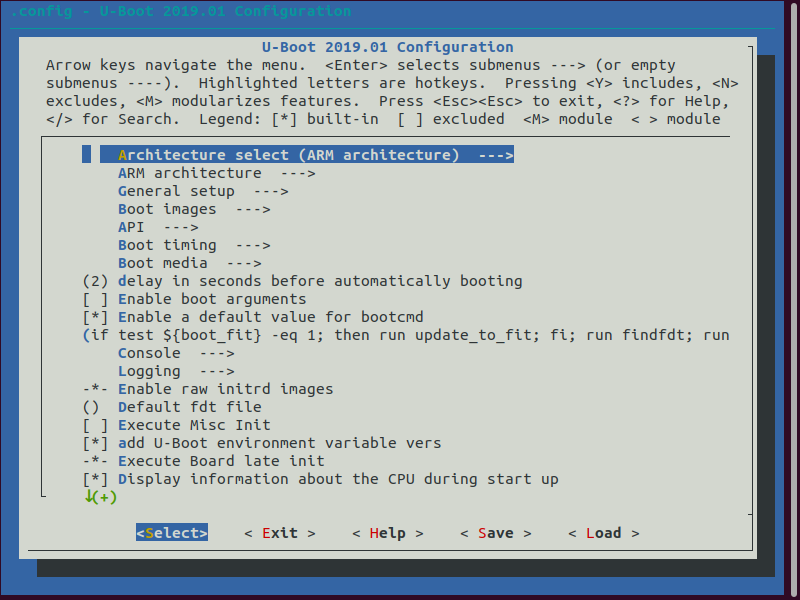
With this menu configuration, you can change a number of settings, including the architecture of the board in use.
If you click 'Enter' on Architecture Select, we can change the architecture of the board. U-boot gives us a number of architectures we can select from.
This is shown below.
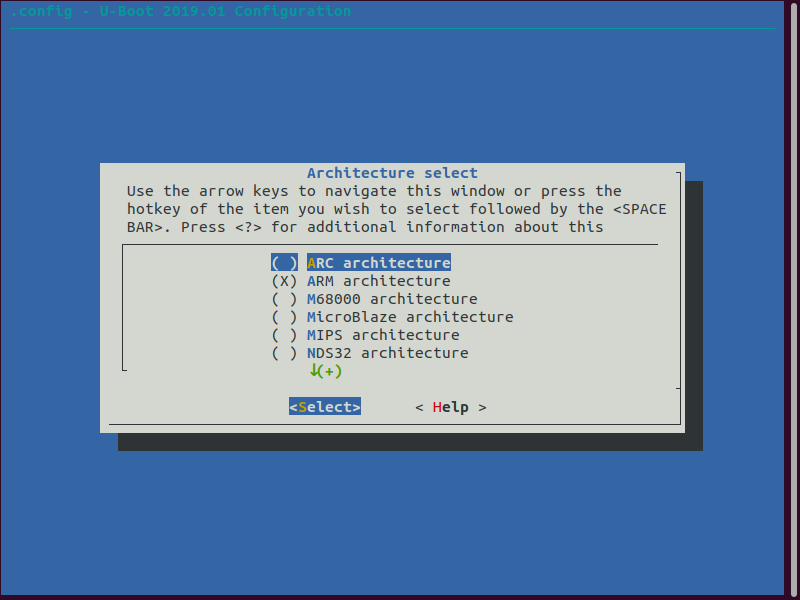
However, we do not need to change the architecture in this case, as ARM is the correct architecture if you are using a beaglebone board.
So, next, what we have to do is the last part of actually generating the SPL, MLO, and u-boot image files.
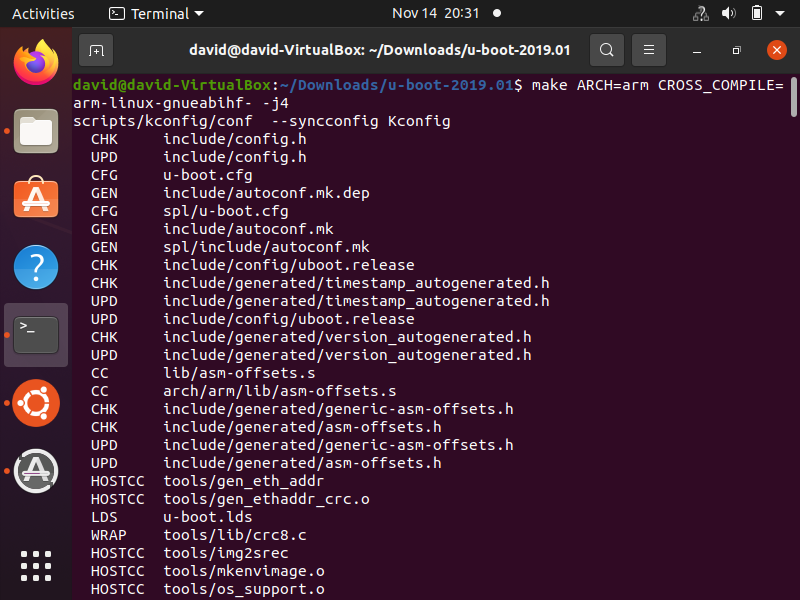
This is done through the following command shown below.
Be aware that if you are using a computer with multiple cores, you can specify this, as this makes the system more efficient.
For example, if you are running this u-boot on a computer that has 4 cores, then you would
use the following code shown below.
Once you run this command, you will see the process begin, such as that shown below.
At the bottom of the files, you will see all the SPL, MLO, and u-boot files created.
This is shown in the image below.
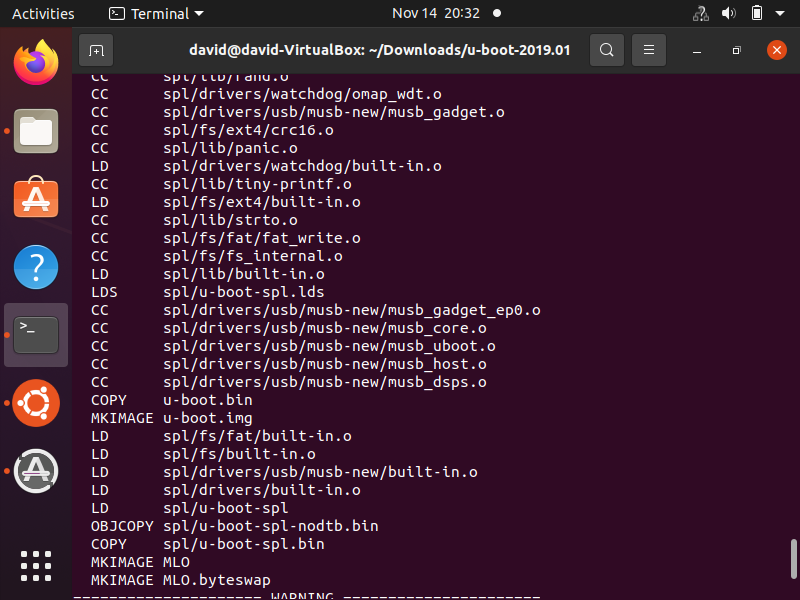
Notice that SPL files are in their own folder, spl/
Notice that the MLO file is in the root directory and so is the u-boot image file.
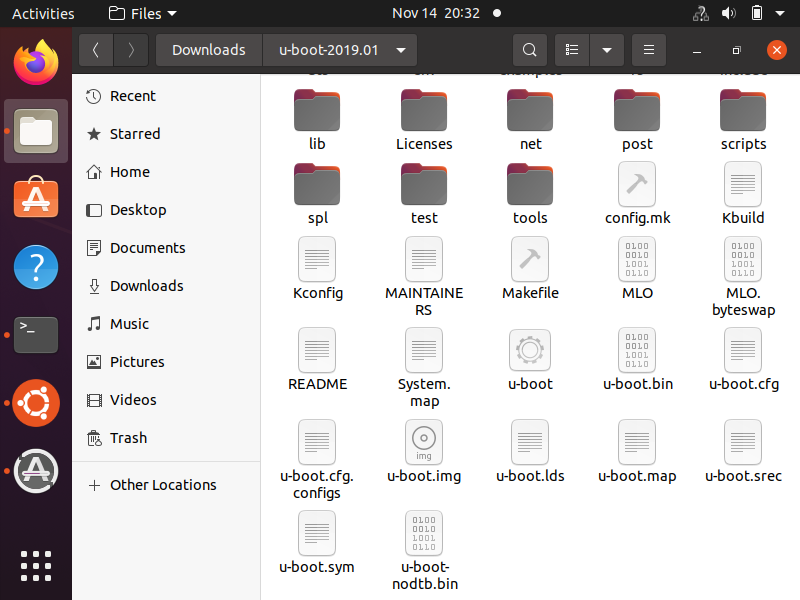
If we go to the u-boot directory, we will see all of these files. This is shown below.
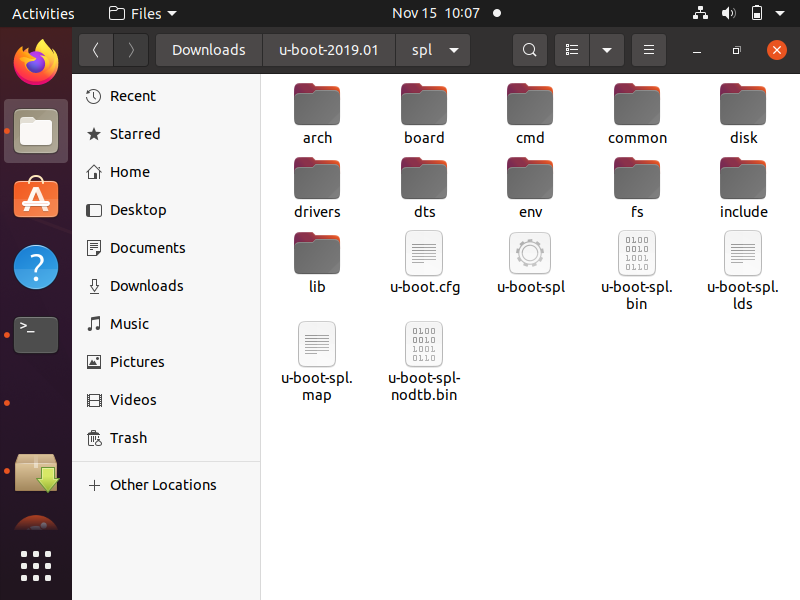
If you were to click on the spl directory, you would see contents such as that shown below.
So this is how you can generate your own custom SPL, MLO, and u-boot image files for a
microcomputer device.
Related Resources