
How to Install the Java Development Kit (JDK) on the Ubuntu Linux Operating System
In this article, we will show how to install the Java Development Kit (JDK) on the Ubuntu linux operating system.
The JDK is a development environment for building applications, applets, and components using the Java programming language. The JDK includes tools for developing and testing programs written in the Java programming language and running on the Java platform.
In order to install this on the Ubuntu linux operating system takes a few steps.
Probably the first most important thing is determining the bit version of your operating system. If you have a recent version of ubuntu linux, it will likely be a 64-bit system.
This can be checked by going to the linux terminal and typing in, uname -m
This is shown below.
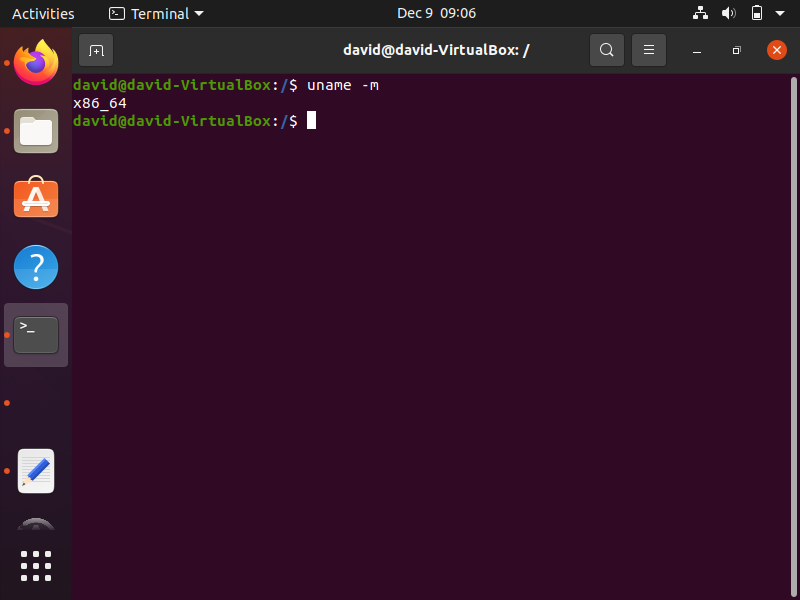
So we see that this is a 64-bit system, so we can download the x64 version of the operating system.
What we do now is go to the Oracle JDK download page for linux and we download the appropriate version to our linux operating system. This page can be found at the following link, https://www.oracle.com/java/technologies/downloads/
So below you will see for a few versions that you can download.
What you want to download for Ubuntu Linux operating system is the version highlighted in red.
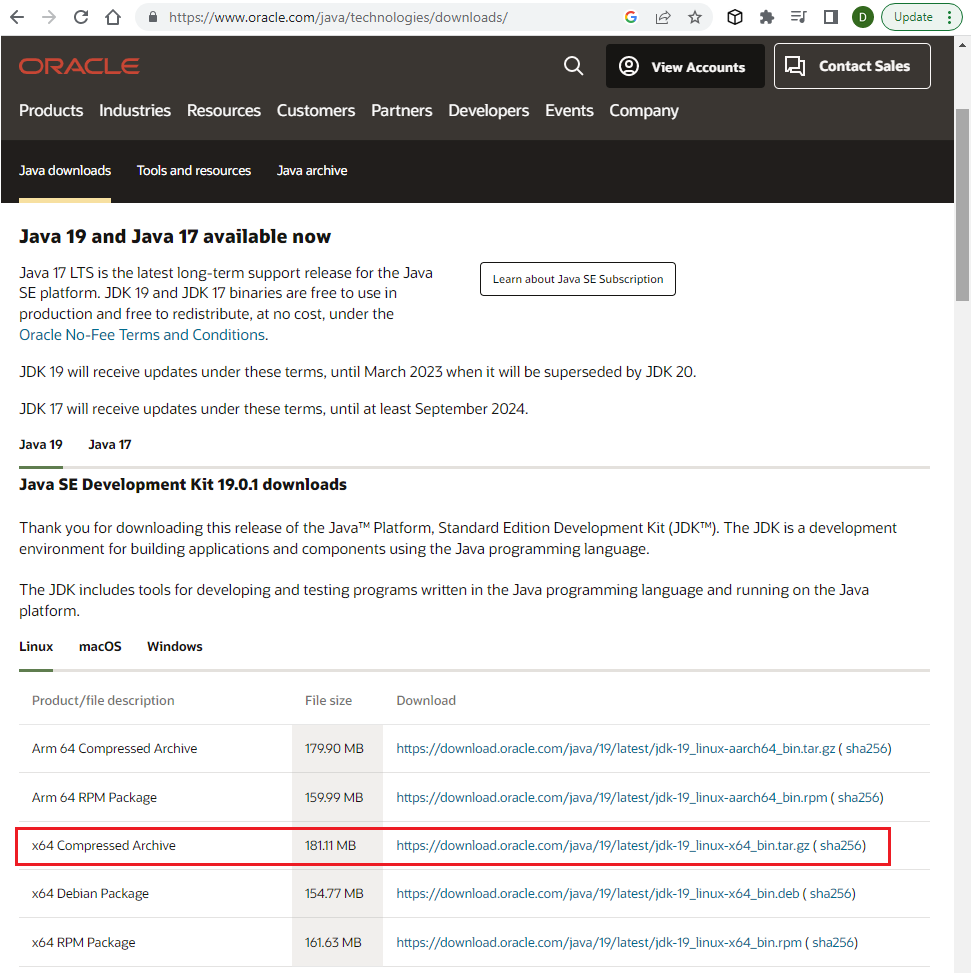
Be careful to not install the Arm 64 version, as this will not work on the Ubuntu linux operating system and will cause an error stating, java: cannot execute binary file: Exec format error
The version for ubuntu must be x64.
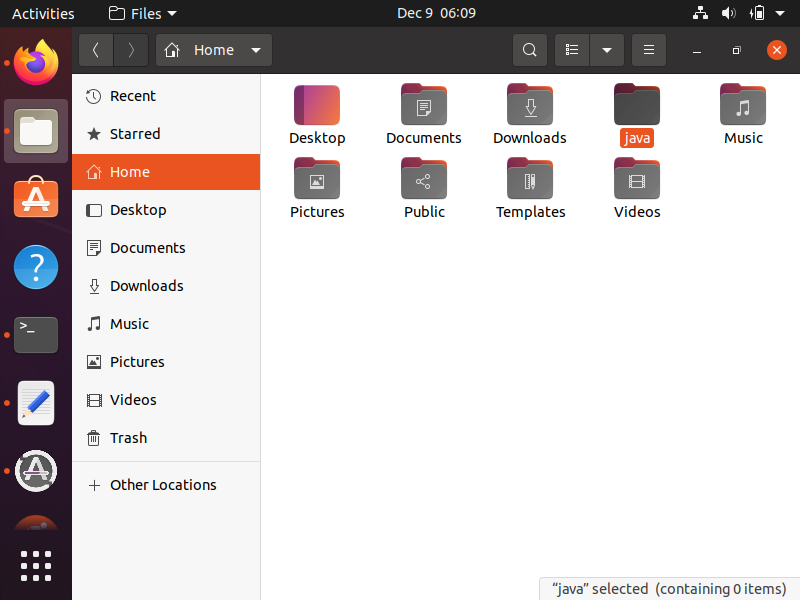
Once this is downloaded on your computer, go to your home directory and create a folder named java.
This can be created by going to the terminal and typing in, sudo mkdir -m777 java, in the home directory.
After this is done, extract the downloaded JDK and extract it to this java directory.
Next go to the /usr/lib/ folder and create a directory named jvm.
Within this jvm directory, create a directory named java_jdk_19
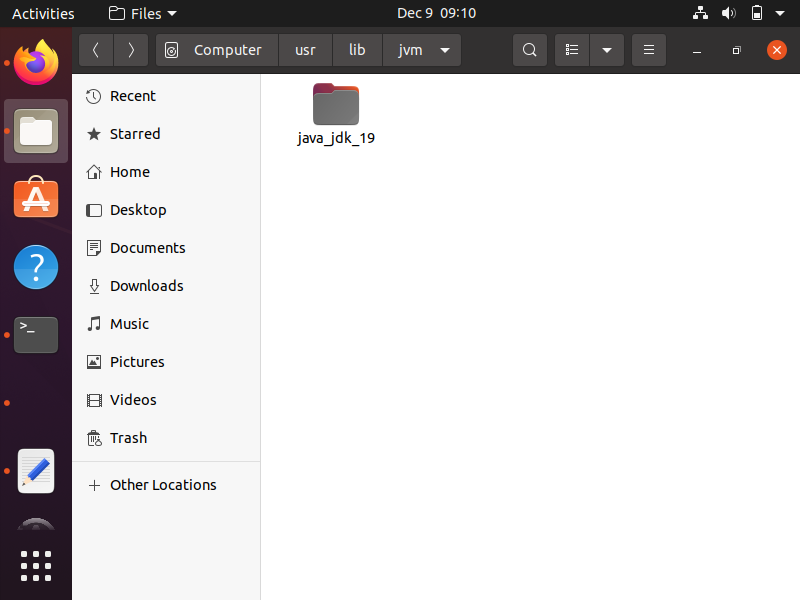
Next, we want to move the contents from the java directory to this java_jdk_19 directory within the jvm directory.
This is because it is highly recommended that this JDK folder be in the location /usr/lib/jvm
So to move the contents from the java folder to the java_jdk_19 folder in the jvm directory, we type in the following
command below.
Of course you would substitute david for your computer name.
Next, we can make sure that java is not installed on our linux system by performing a query.
If java is installed on your system, the commands will return the version. If java is not installed, then you will get returned the response, no alternatives.
The first command is shown below.
The next command is the following.
If no alternatives were returned, then we can update the alternatives.
This can be done through the command.
Then we run the command next.
Next run the following commands.
And the next one is below.
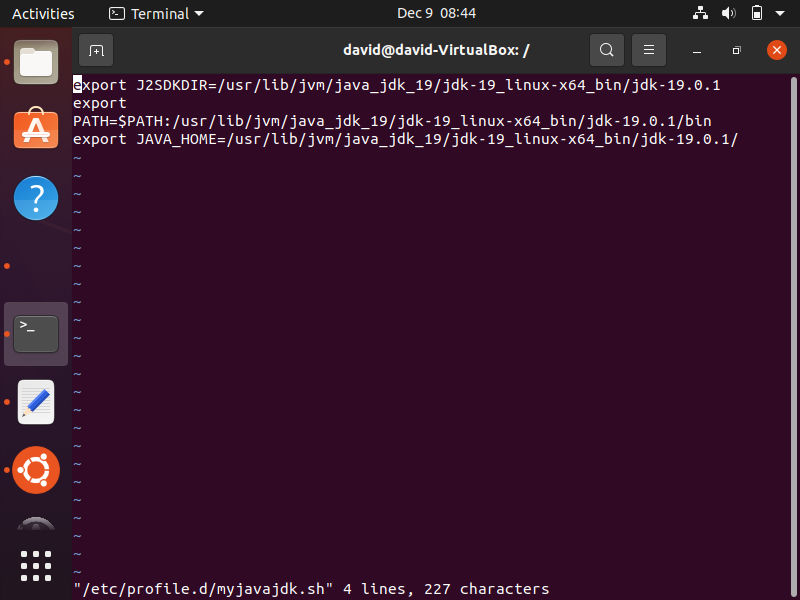
Next we need to change and update the environment variables.
We do this through the following command.
This will open up the vi text editor.
Within this file, you want to put the following text below.
This should look like the following below.
Once this is done, save the contents by pressing Esc and then :wq
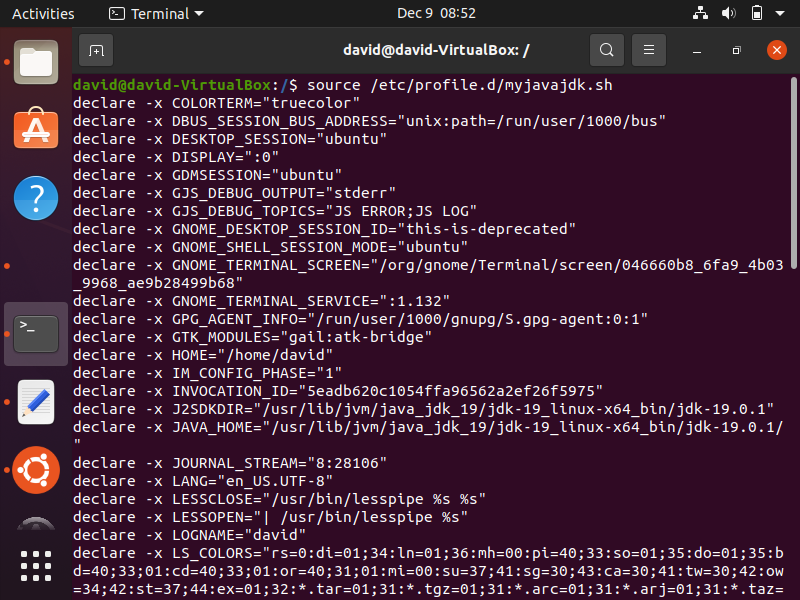
The last thing we have to do is source the contents of these environment variables, so that they're recognized system wide in our linux system.
To do this, we use the following command below.
After you do this, you should see an output such as that shown below.
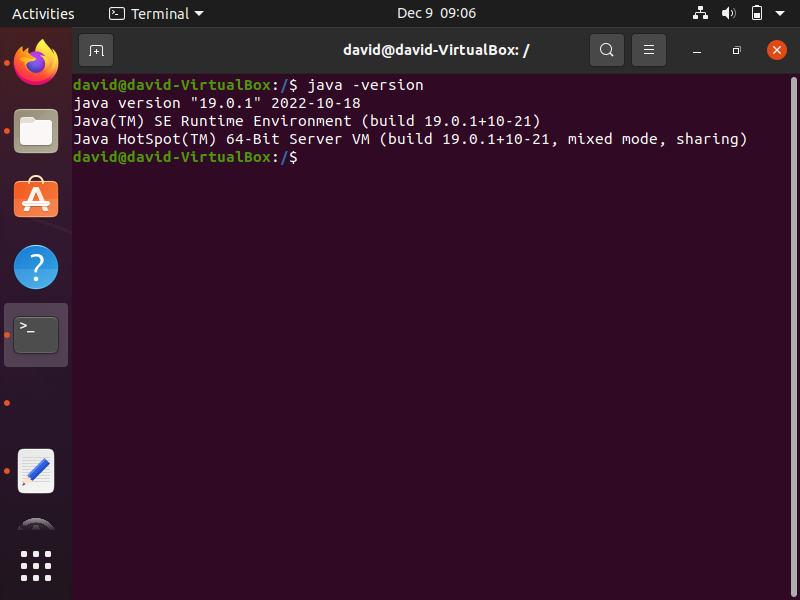
Once this is done, now comes the big test.
We want to see now if java is installed on our linux system.
To do this, we run the command.
If you get back the response, bash: /usr/bin/java: No such file or directory, then java has not been successfully installed on your linux system.
If you get back the java version, then java is now installed on your linux system and you can use it to do java-related programming tasks.
Below is a successful installation of java on a linux operating system.
So this is one way of installing the java development kit (JDK) on a ubuntu linux operating system.
Related Resources