
How to Load a Linux Kernel Image from U-Boot using an SD Card on a BeagleBone Board
In this article, we will show how to load a linux kernel image from U-boot from an SD card on a beaglebone black board.
U-boot can then load the linux kernel, which can be any various version of a linux operating system, for example.
This is a very educational process, because it teaches you all the steps along the way that are needed to load a linux kernel, from the first stage bootloader to the second stage bootloader to U-boot (which is the third stage bootloader).
So we will load U-boot onto an SD card. We then will insert the SD card onto the board and boot U-boot from it.
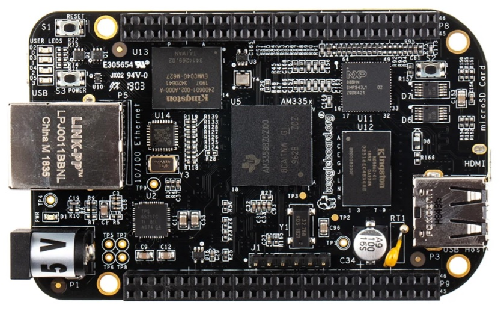
So the first step is to prepare the SD card, which for the beaglebone board is always a microSD card, which is what fits into the SD card adapter on the beaglebone board.
So the first thing you will need to do is get a USB SD card reader, which one, for example is found at the following link on amazon.com: USB SD Card Reader
Even though there are SD card ports on laptops where you can insert the SD card in directly, the linux operating system may not be able to detect the card this way.
The more sure way of being able to detect the card is by putting the card into a USB SD card reader. This SD card reader will then be easily identified by the linux operating system.
Then you'll need to make sure that you have a microSD card, which we will partition.
So let's now go over how to partition the SD card.
The SD card will be partitioned into 2 partitions, the first being the BOOT partition and the second which will be the ROOTFS (Root filesystem) partition.
Those are the 2 partitions needed to boot a linux kernel (which is what U-boot achieves).
The BOOT partition contains the MLO (second program bootloader), the u-boot software, and the uEnv.txt files.
The ROOTFS partition contains the all the files needed for the root filesystem of the operating system, including the linux kernel file.
So below a visual of what we will need to do with partitioning software.
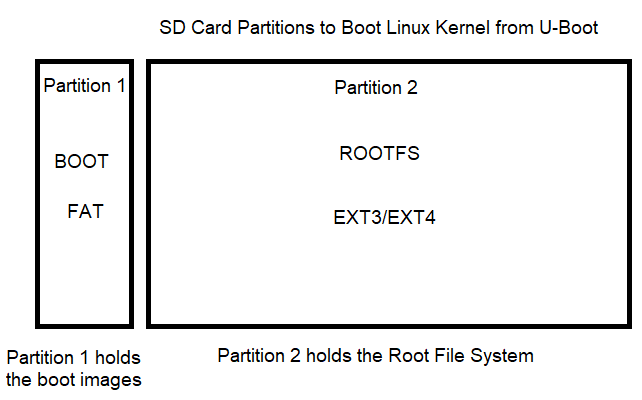
You can see in the diagram there are 2 partitions.
The BOOT partition will be the smaller of the 2, because the BOOT files do not take up much memory.
Notice how the BOOT partition is of the FAT file system type.
The FAT file system is a file system created by Microsoft in 1977 and is still used today as the preferred file system for many portable media devices, many of which are used as bootable devices or devices which can be used to boot an operating system, such as floppy drive media, flash drives, and SD cards.
So when we are creating the BOOT partition, this must be of file system type, FAT, specifically FAT16.
The next partition is the ROOTFS partition, which will be the larger partition, because it stores much more data. While the BOOT partition is simply the BOOT media, the ROOTFS stores all the file systems of the operating system.
This partition will be of file system type, EXT, which is a native linux file system. This makes sense because we are booting a linux kernel. Specifically, our file system will be of type EXT3.
So the next thing we need is the software that will do our partitioning of the SD card.
There's a software available in linux called gparted, which is a GUI software which can partition drives. So this is what we will use.
If you don't have it on your operating system, it is a simple download.
So after downloading this software, plug in the USB SD card reader with the microSD card inside of it.
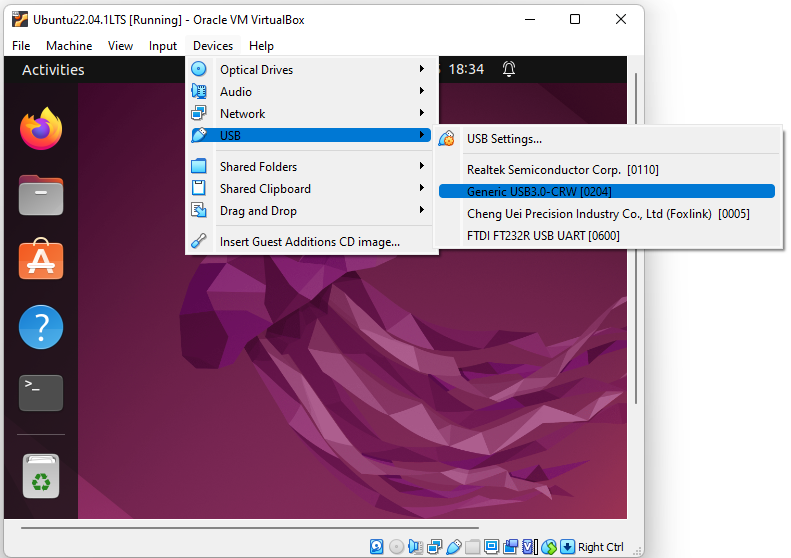
Before you go into the software, you must make sure that the linux operating system recognizes the USB SD card reader device.
What you do is go to the menu and drop down the tab for devices and select under the USB devices the SD card reader. After you click, there should be a check mark next to it. This shows that the linux operating system now recognizes it. This will now be picked up by the gparted software.
This is shown below.
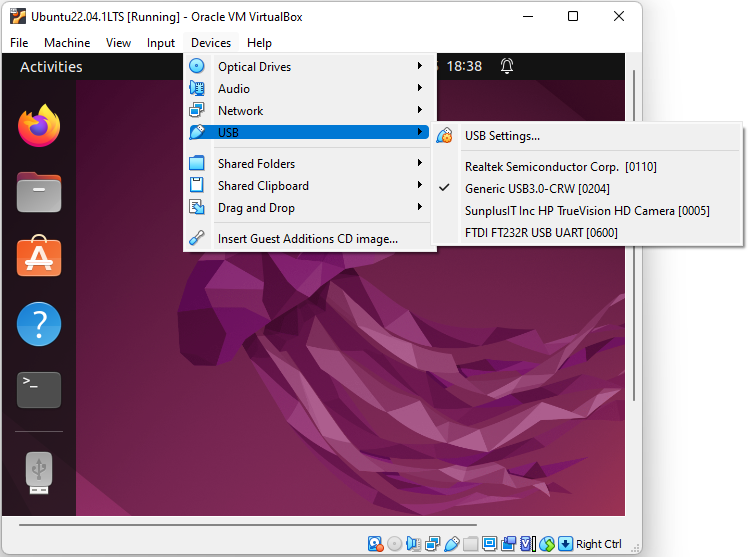
After you select the appropriate device, you should see a check mark by the device, as shown below.
So now that the operating system recognizes the device, now we can start with partitioning the SD card with the gparted software.
So the first thing you want to do is make sure that you delete any partitions, if there are any on the SD card. What you want is any SD card completely unallocated.
Then you can start with creating the first partition.

You want to create a partition named BOOT that is about 1095MB (or 1GB) in space that is of type FAT16.
This is shown below.
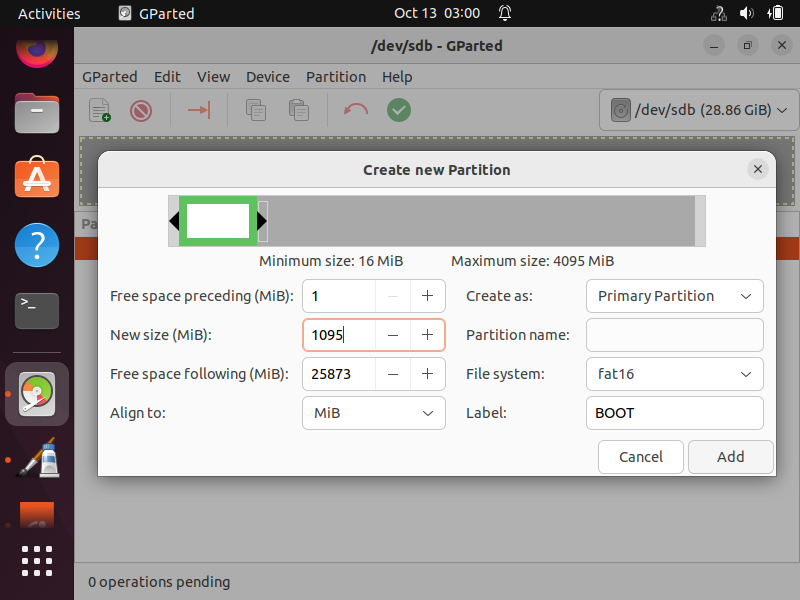
So once you have these settings, you can click the 'Add' button at the bottom right of the window.
Then you need to go back to the Unallocated space of the drive and right click and create a second partition
for the root file system.

This partition will be of file system type, EXT3.
Name it ROOTFS.
The space can be the rest of the unallocated space of your SD card.
This is shown below.
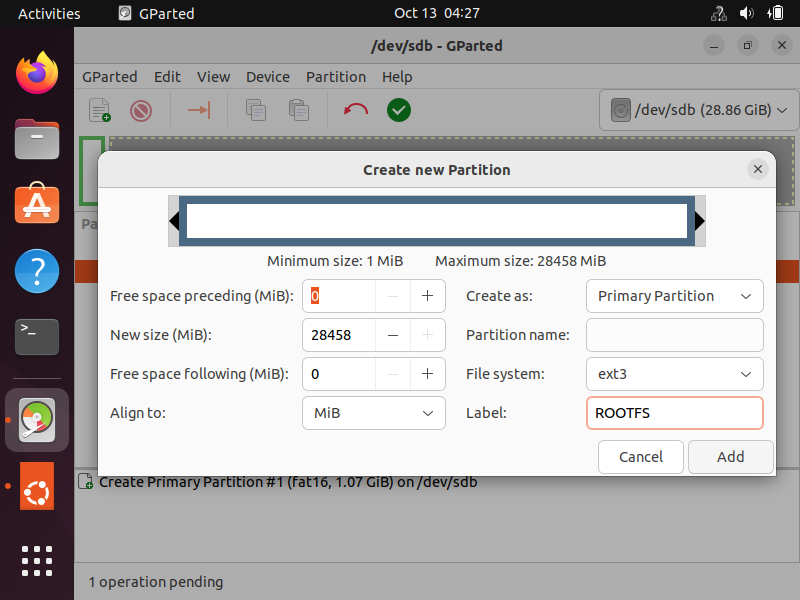
So definitely let the ROOTFS partition be the remainder of the memory for the SD card. This is to prevent there being a third partition, which is unnecessary.
So now we have all the partitions that we need for booting the linux operating system.
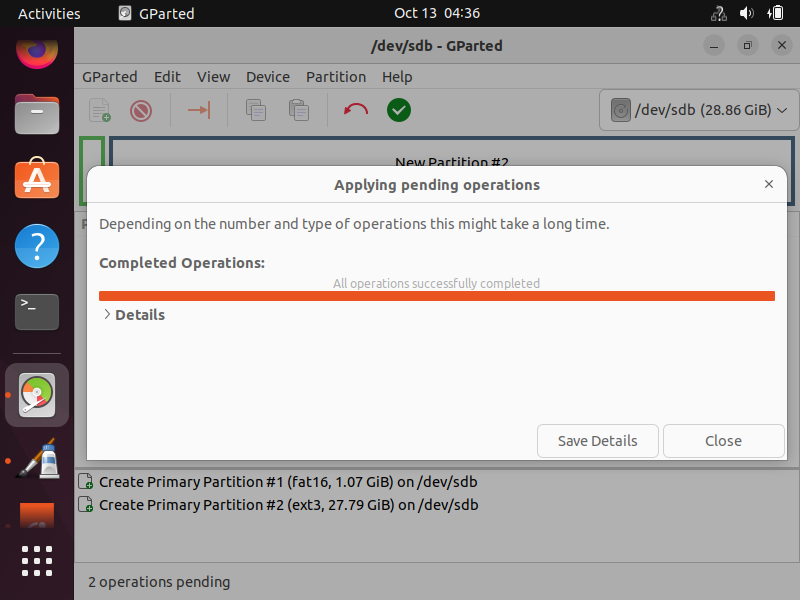
However, they are not created until we click the green check mark at the top of the page, which applies all operations that we have done (to create the partitions). Once you click this button, the program will take some time to create the partitions.
But once the program is done, you will get a message stating its success. This is shown below.
After we are done with this, there is one last thing we must do in gparted.
We must add a boot flag to the BOOT partition.
This is done by right clicking on the BOOT partition and clicking on 'Manage Flags'
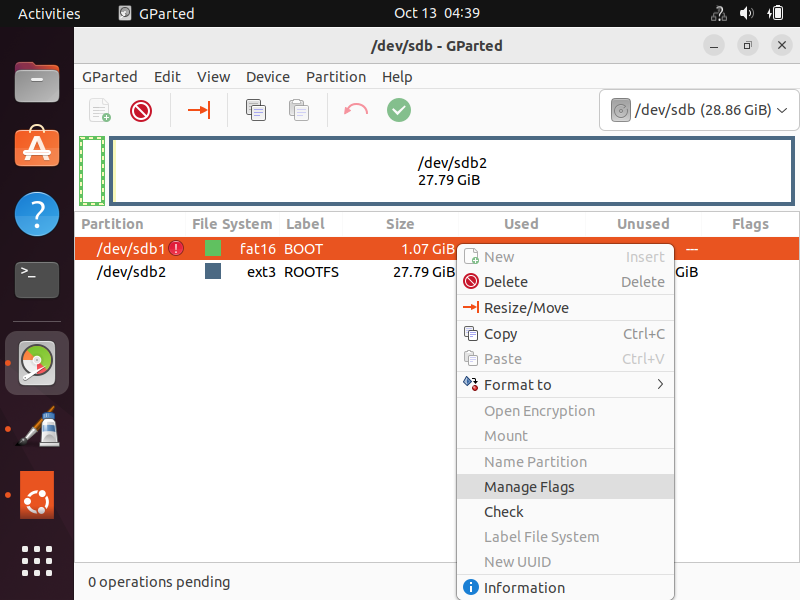
In the new window, you want to select 'boot'
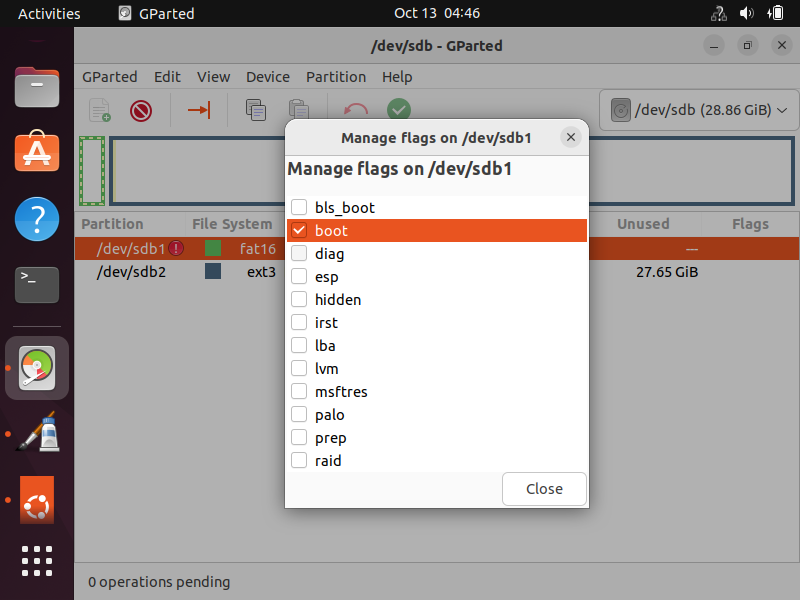
Then you press the 'Close' button.
Now when you view the partitions, you should see the boot flag present by the BOOT partition, which is
shown below.
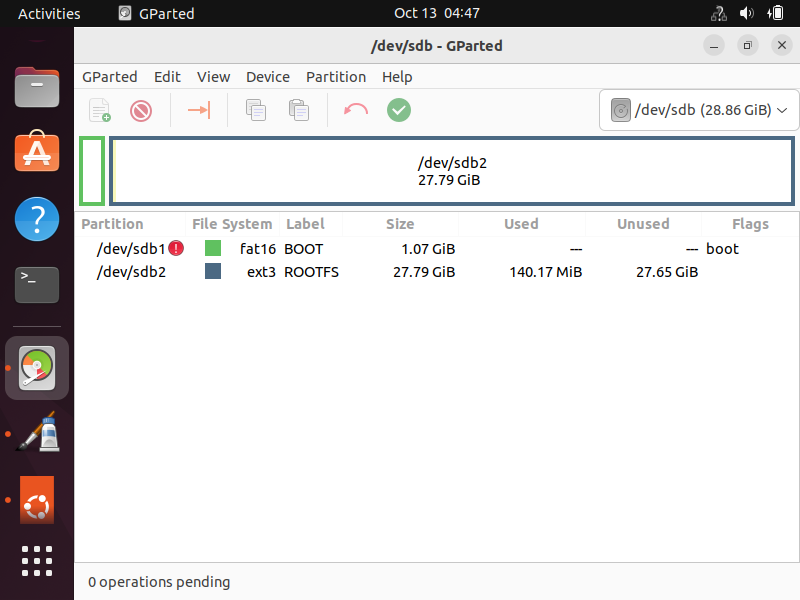
Now we are completely done with partitioning the SD card.
Now close out of the gparted software.
You should see on the left side of the screen these partitions show up.
These are shown below.
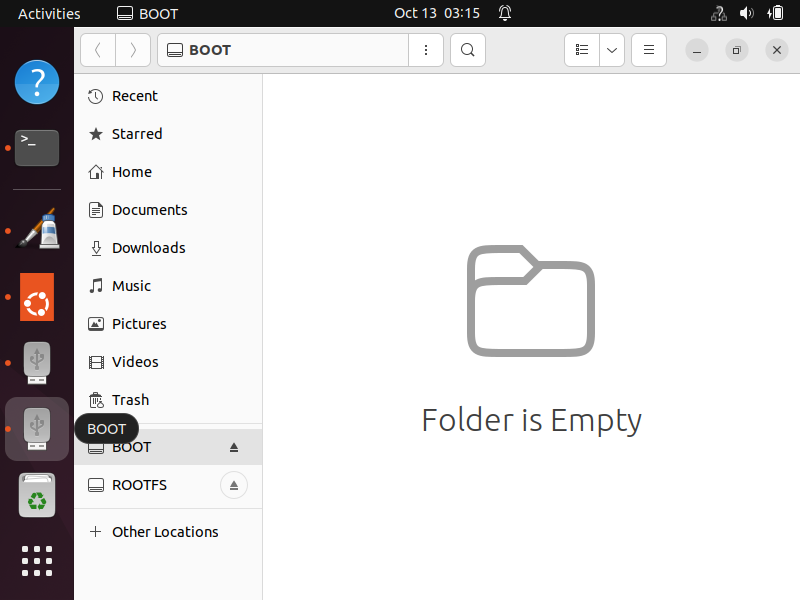
So this is great.
We now have working partitions that the linux operating system recognizes and they show up in the operating system.
Now we have to populate the partitions with the necessary files.
We will start with the BOOT partition.
So the first file that we are going to place into the BOOT partition is the MLO file, which is the second stage bootloader program.
An example MLO file can be found at the following link: MLO-beaglebone-2013.04
Download this file to your linux operating system and it must be placed within the BOOT partition.
In order to do this, you simply can't copy and paste it, because you need root privileges.
You're going to need to go to the terminal, so that you can have sudo privileges to copy the MLO file from where you downloaded it to the BOOT partition.
To do this, go to the Downloads folder. Usually anything you download will be placed into this folder.
And then you'll have to type in the following command.
This line will copy the MLO file into the BOOT partition.
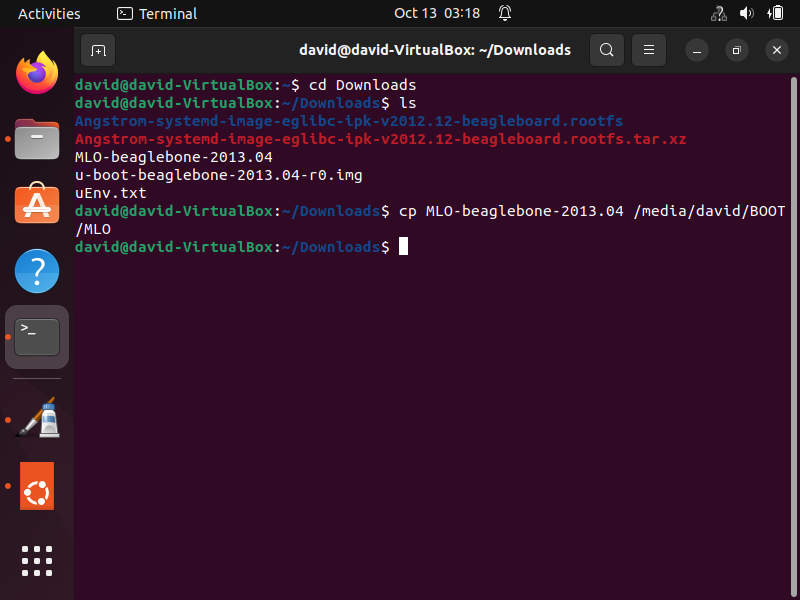
Realize that whatever you named your computer, you replace that with david, as you see above.
After you run this command and then go to the BOOT partition, you should see the MLO file present.
This is shown below.
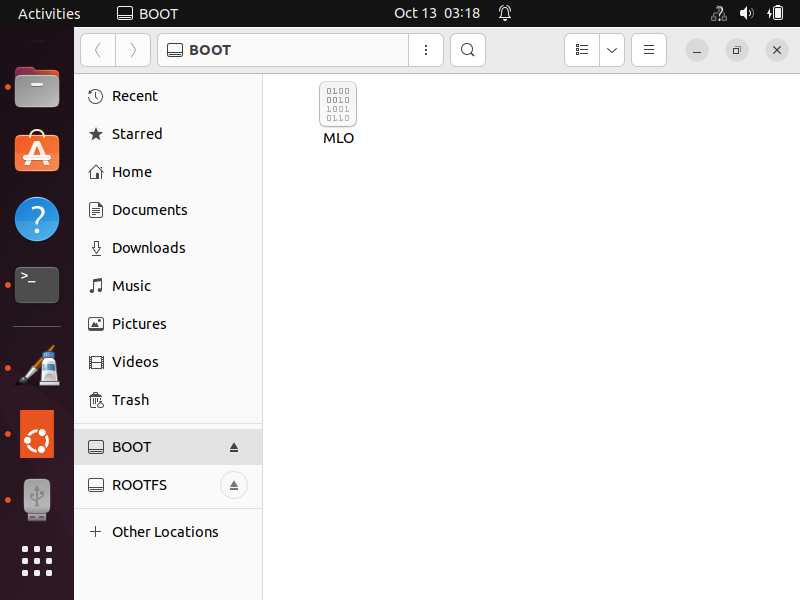
So congratulations up to this point.
You now have the MLO file, which is the second program bootloader needed to boot a linux kernel.
By itself, this will not boot the linux kernel. Because we haven't yet copied u-boot into the boot partition. And we haven't copied the root file system files into the ROOTFS partition, including the needed linux kernel file.
However, if you were to take the SD card now, with just the MLO installed on it,
you would get the following output, shown below.
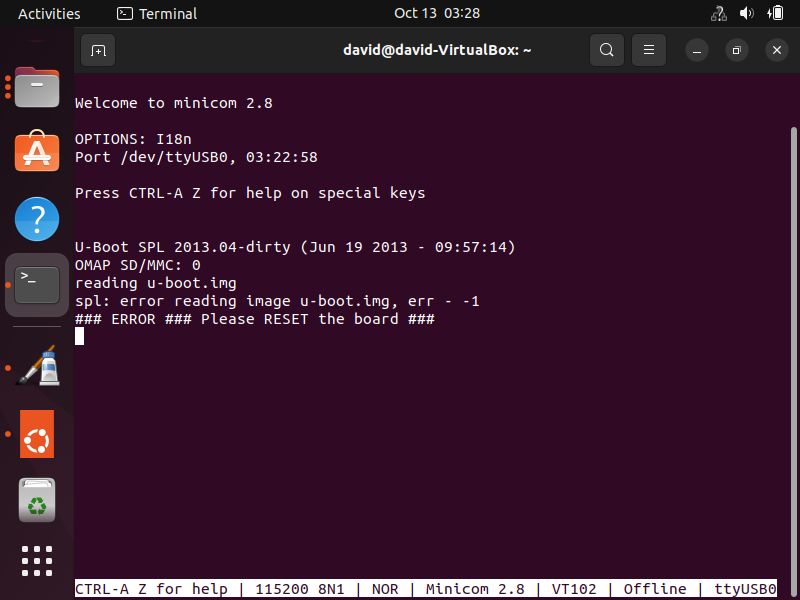
So you can see that the MLO tries to load u-boot, which is the third stage bootloader, but it is unable to because we haven't yet downloaded U-boot in the BOOT partition.
So next, we will add the remaining files to the BOOT partition that is needed to completely the linux kernel.
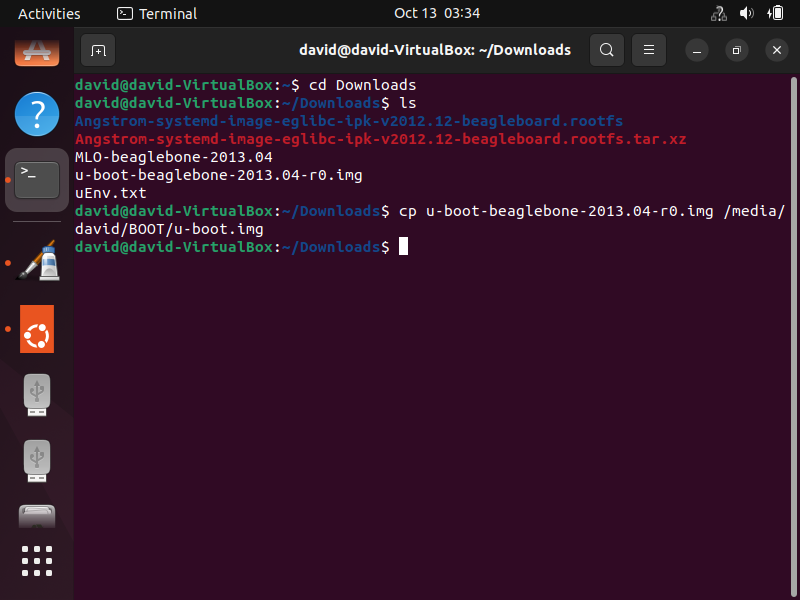
So, in the same manner, we go back to the terminal and copy our next file, which is the u-boot file.
An example U-boot file can be found at the following link: u-boot-beaglebone-2013.04-r0.img
To copy the U-boot file, we use the following command below.
The running of this code is shown below.
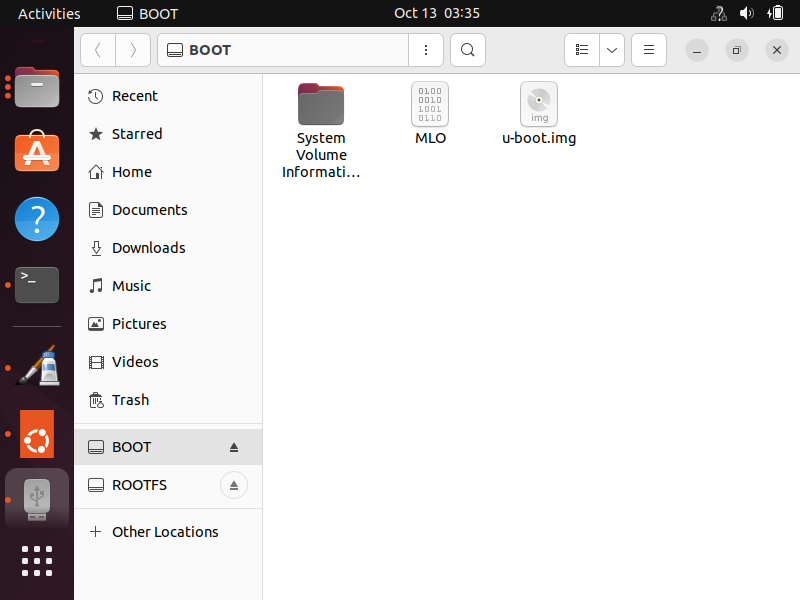
After you run this command, you should see the U-boot file within the BOOT partition.
This is shown below.
Next, we have one more file that we have to add to the BOOT partition, and this is the uEnv.txt file.
This file gives instructions to U-boot, so that U-boot knows certain things, such as where the linux kernel image is located, so it can load the linux kernel. It also needs to know things such as the type of boot media used to load the operating system, which in this case is an SD card.
Through modification of the uEnv.txt file, we can change boot settings for U-boot.
An example uEnv.txt file can be found at the following link: uEnv.txt
So now go back to the terminal and enter in the following command, shown below.
So this is a very simple command, which is shown below.
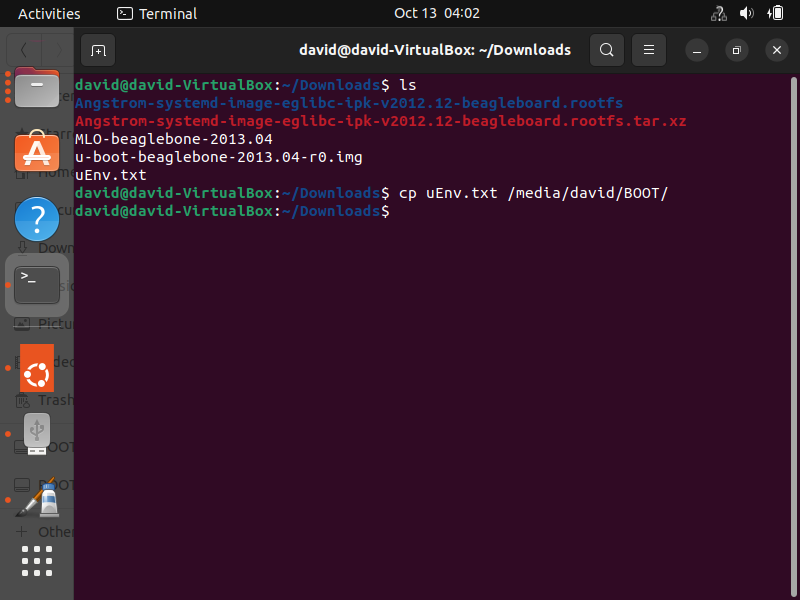
So after you run this command, you should see the uEnv.txt file inside of the
BOOT partition.
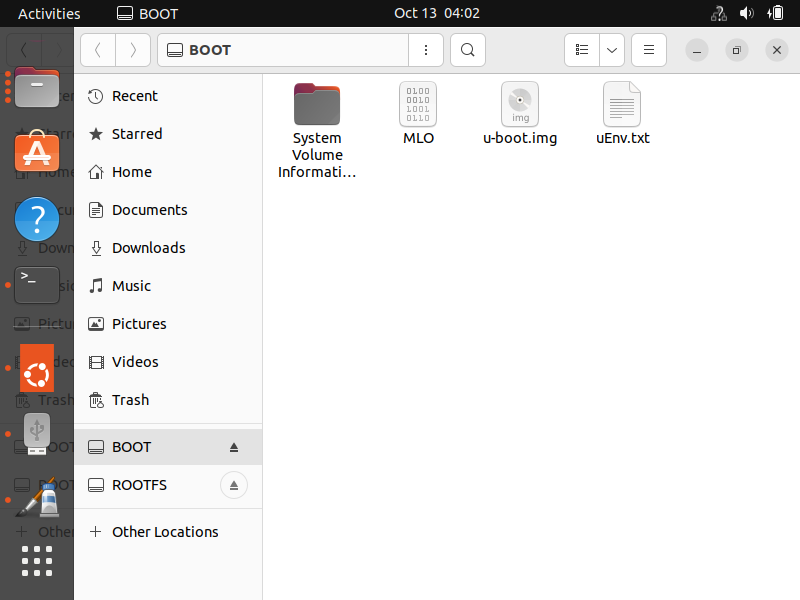
So now we are all set in terms of the files we need in the BOOT partition.
If you were to remove the SD card now and place it in the beaglebone board, you would have U-boot run but it would not be able to load the linux kernel, because we haven't yet downloaded the linux kernel.
The output would look like that shown below.
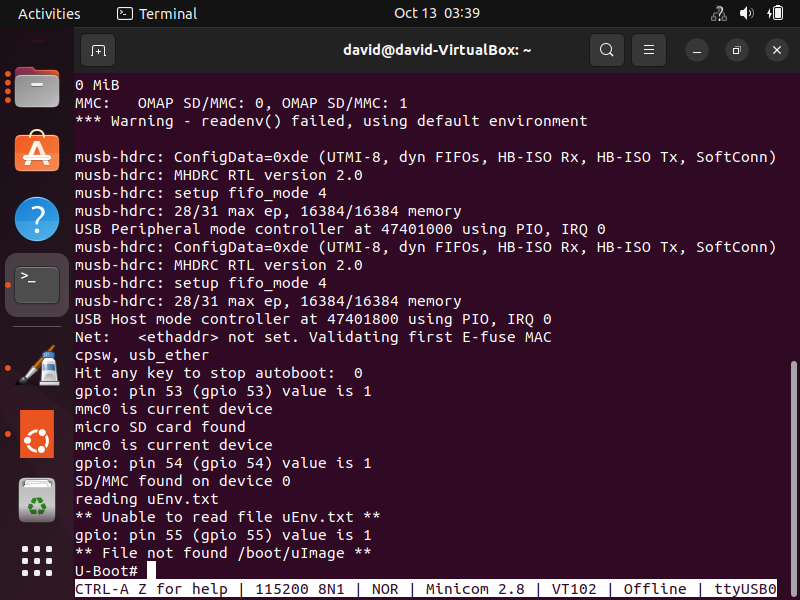
You can see that no file was found in /boot/uImage because we haven't yet placed the necessary files in the ROOTFS partition.
So next, we will place the necessary files in the ROOTFS partition.
An example package of root file system files can be found at the following link: Angstrom-systemd-image-eglibc-ipk-v2012.12-beagleboard.rootfs.tar
So, like before, we open up the terminal and we go into the folder containing the root file system files and copy them to the ROOTFS partition.
The command to do this is shown below.
After you copy the files, make sure that you sync them afterwards.
This is shown below.

So after you do this, go into the ROOTFS partition and you should see all the folders in this partition.
This is shown below.
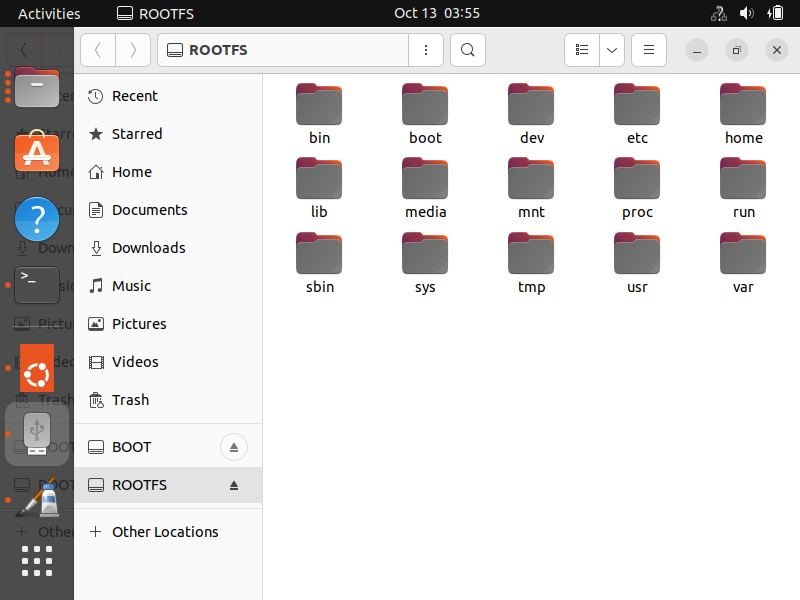
So once you see this, you now know that you have everything set up.
Now you can remove the SD card from the USB SD card reader and place it into the SD card adapter on the beaglebone board.
Shut off the power to the board by pressing down S3 until the board powers down and, while holding the S3 button, turn power back on the board by pressing S3.
The linux kernel, an Angstrom Distribution version, should be booted.
This is shown below.
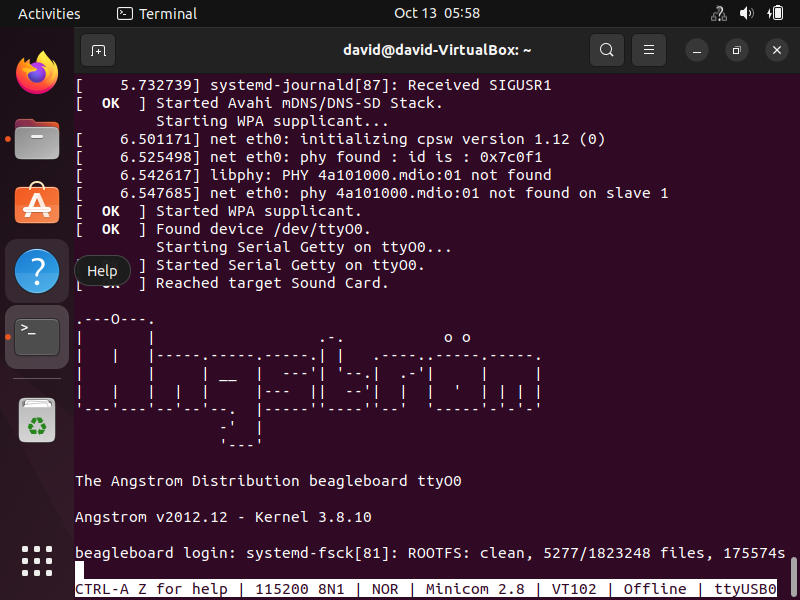
This now means that you have successfully booted a linux kernel from U-boot.
In this case, we have used pre-built files. However, you can also create your own MLO files
from scratch, as well as your own linux kernel image. This we will do later in further linux tutorials.
So this is how we can load a linux kernel image from U-boot from an SD card on a beaglebone board.
Related Resources