
How to Open and Control the Chrome Web Browser in Windows using the Selenium Module in Python

In this article, we show how to open and control the Chrome web browser in Windows using the Selenium Module in Python.
Using certain tools within the Selenium module in Python, we can open and control the Chrome web browser through Python code.
Instead of the normal, conventional way of clicking the Chrome web browser and manually entering in a URL to get to a web page, we can achieve all of this through Python code.
In this article, we show how to install selenium and ChromeDriver so that you can make use of this functionality.
So the first thing you need to do is install the selenium module.
This can be done in the windows command prompt using the line below.
When running a pip command, make sure that you're within the Scripts directory of Python.
It will tell you then if it has successfully installed.
You can check if it is installed by opening your Python software and typing in, import selenium
If there is no error message, then the selenium module is installed on your PC.
The next thing we must do is install the ChromeDriver for our Windows PC.
The ChromeDriver software allows us to interact with the Google Chrome web browser.
So let's now go over how to install the ChromeDriver software.
The page that contains all of the different downloads for the ChromeDriver softwares is shown at the following link: ChromeDriver Downloads.
The version of the ChromeDriver that you want to install should be compatible with the type of Chrome browser that you currently have.
If you download a ChromeDriver version that isn't compatible with the Chrome browser that you have, the software will not work.
You can find out the version of Chrome that you have by opening up the browser and selecting 'Help' and then 'About Google Chrome'
The version you have will be listed on that page.
An important point is that there is only one version for Windows that will work on both 32-bit and 64-bit Windows operating systems. You'll notice that when you look through the ChromeDriver Downloads page, for windows downloads, you always see the number 32. You may think that only 32-bit windows operating systems are supported. However, this is not the case. I have tested it on 64-bit windows operating systems, and it has worked. So both versions are supported.
Once you have downloaded this file and extracted it (being that it is a compressed file), then the next thing you have to do is add it to the Windows Path environment variable. This allows Windows to be able to locate the executable file of the program to run it. If you don't add it a path environment variable for it, the Windows operating system wouldn't know where the executable file is to run the program.
To add a path environment variable for the program, go to the Windows search bar at the bottom and type in, Edit Environment Variables.
The following should now be shown on your screen.
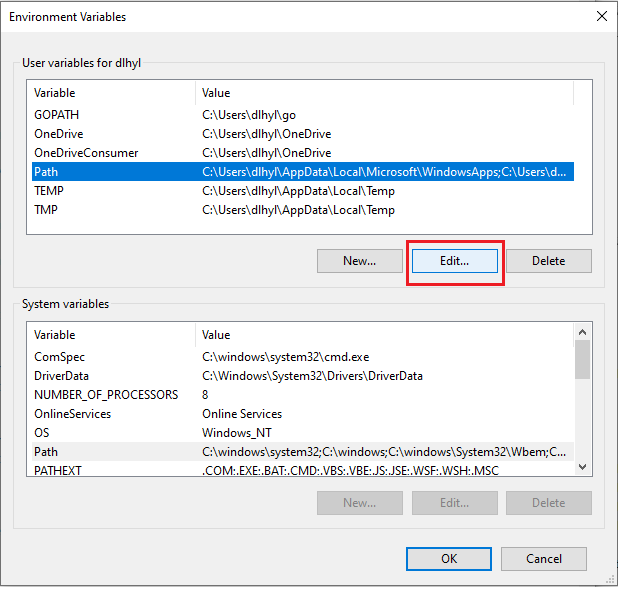
To edit path environment variables, click on 'Path' and click the 'Edit' button.
The following should now be shown on your screen.
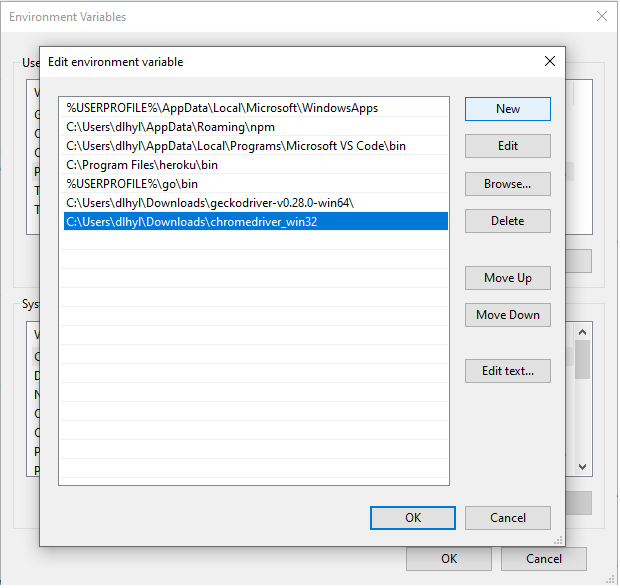
Now that you're on this Screen, click 'Add' to put in another path variable. Add the complete path to the folder which contains the executable ChromeDriver program. You're not specifying the path to the executable file, but t to the folder that contains the executable file.
Once you've clicked 'Ok' twice, there should be a path environment variable to the ChromeDriver software on your Windows PC.
To test this out, open the Command Prompt on your Windows PC, and type in chromedriver.
If you see the following below, this means that the ChromeDriver software on your PC is up and running.
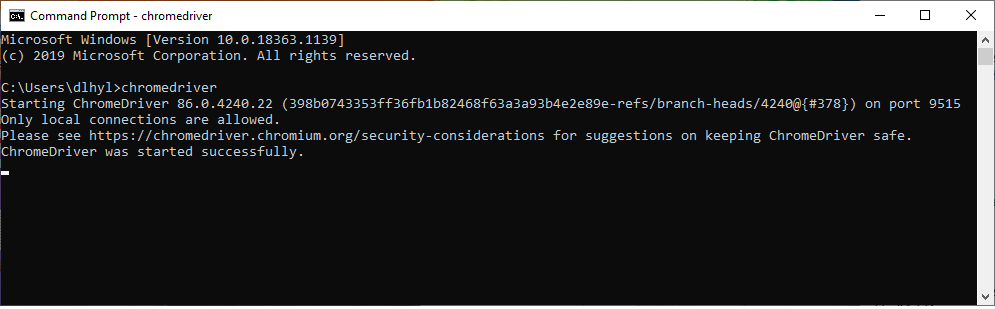
Once you've reached this point, then you can now open your Python software.
We will write a basic program using the Selenium module to open the Chrome web browser and go to amazon.com website.
This is shown in the code below.
The first thing we have to do is import webdriver from the selenium module. This allows us to work with web browers; in this case, Chrome.
We then create a variable, browser, which we set equal to, webdriver.Chrome(). This allows us to make a connection to the Chrome browser.
Next we use the get() function to retrieve the amazon.com website.
Know that all of this is done by the webdriver in Python code. We do not click the Chrome icon manually to open it up or manually enter in the URL. All of this is done through the webdriver in the Python code.
So this is how we can open and control the Chrome web browser in Windows using the selenium
module in Python.
Related Resources
How to Create a Zip File in Python
How to Extract All Files and Folders from a Zip File in Python
How to Read the Contents of a Zip File in Python