
How to Print a Debug Statement through OpenOCD Semihosting in an STM32F4xx Microcontroller Board
In this article, we show how to print a debug statement through the printf() function in an STM32F4xx microcontroller board through OpenOCD semihosting.
OpenOCD stands for Open on-chip debugger.
The debugger on-chip allows for the processing of a statement through the printf() function.
Unlike serial wire viewing (SWV), the OpenOCD debugging method through semihosting is available for use in any STM32 board.
With serial wire viewing, only STM32 boards with an M3 processor or higher can be used. With OpenCV, all are equipped with on-chip debuggers; thus, this method can be used with all boards.
So let's begin the process of how we can print a debug statement through the OpenOCD semihosting method in an STM32F4xx board.
The first thing that you need to do is change the Debug probe from the default ST-Link GDB server to ST-Link (OpenOCD).
This is shown below.
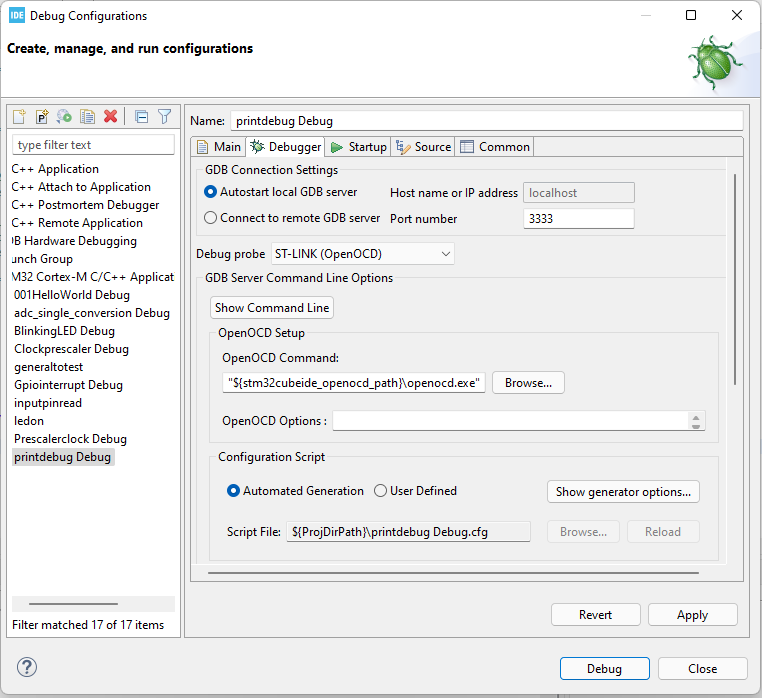
So now we have selected the OpenOCD debug probe, the on-chip debugger (OCD) of the board will act as our debugger.
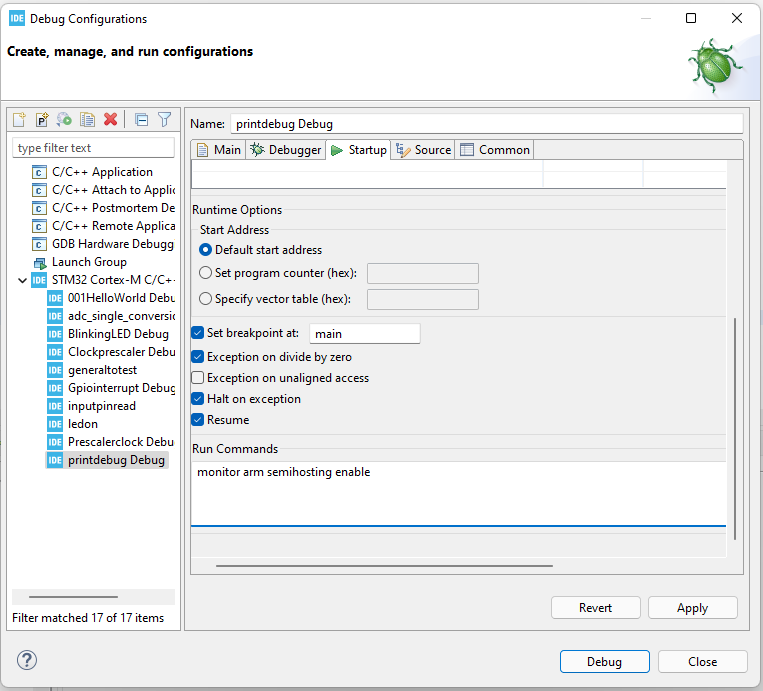
The next thing we need to do is enable semihosting.
This is done by running the command, monitor arm semihosting enable, in the Startup tab of the debug configurations.
This is shown below.
Once you do this, all you have to do is click 'Apply' and then 'Close'.
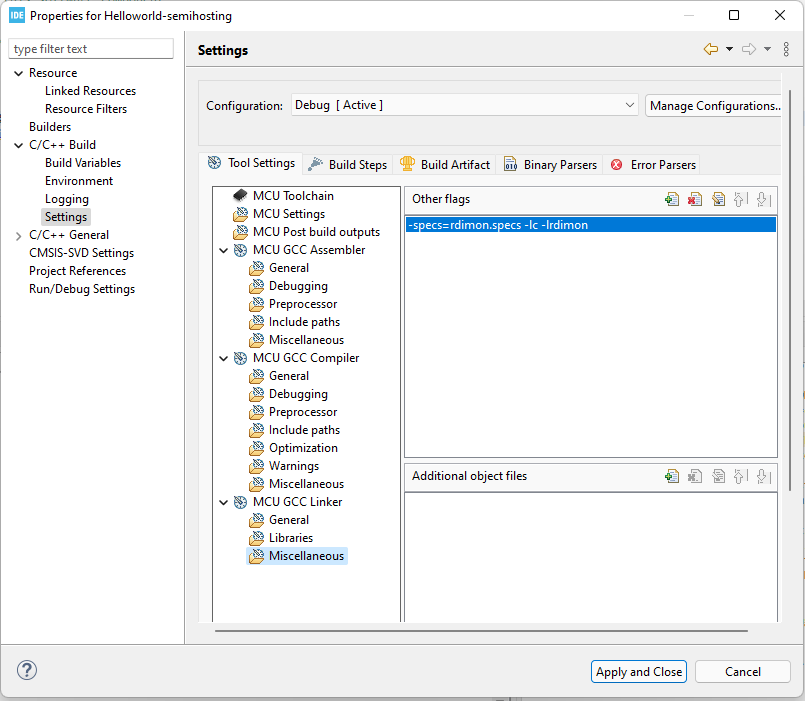
Next, you want to add the following line to the Miscellaneous section of the MCU GCC Linker, -specs=rdimon.specs -lc -lrdimon
You access the MCC GCC Linker section in the Properties tab of your project. You right click on the project and then drop down to Properties. You will then see a Settings section under C/C++ Build. Click on this Settings tab and you will see the Tool Settings tab selected. Go down to directory, MCU GCC Linker, and click on 'Miscellaneous'.
Under the Other flags section, click 'Add' where you see the plus green symbol.
This is shown below.
Then you just click 'Apply and Close'
We now have all the settings in place in order to debug a program with the on-chip debugger.
So the program in order to print a simple debug statement by utilizing
semihosting through the OpenOCD debug probe is shown below.
This code consists of a single printf() statement, in which you can print any text you want.
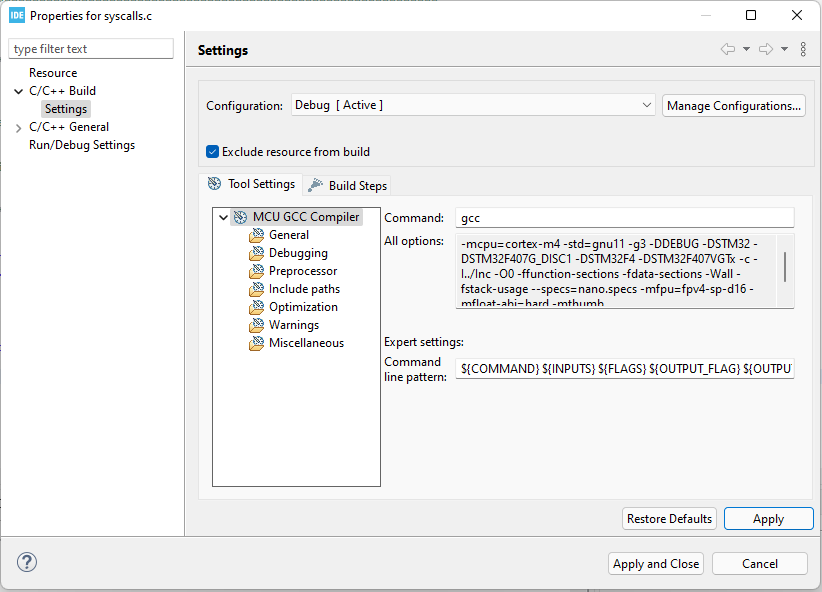
One last thing you must do is exclude the syscalls.c file from the build of the project.
This is done by right clicking the syscalls.c file within the Src directory and going down to Properties.
Once at Properties, there is a box to Exclude resource from build. Click this. This is will not include the syscalls.c file when you Build Project.
This is shown below.
Now you can debug the program.
You'll notice that the program stops at the printf() statement.
Click the Step Over button until it moves past this printf() statement to the next line, for(;;);
You should then see the statement, Hello World, print on the console below.
This is shown below.
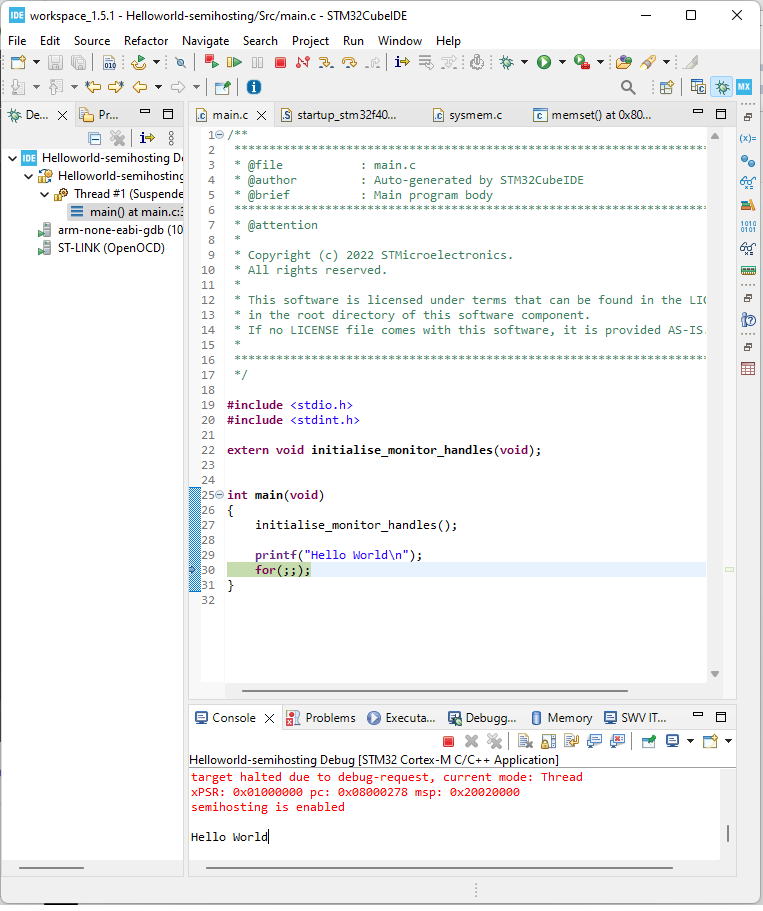
So now you see the output in the console.
So this is one way of printing a debug statement through OpenOCD semihosting
in an STM32F4xx board.
Related Resources