
How to Rotate an Image in Python

In this article, we show how to rotate an image in Python.
Python has modules that go along with it that allow for image manipulation.
One thing that can be done is images can be rotated any degrees desired from its original position.
Using the Pillow module, we can rotate images in Python, kind of creating our own image editing software or rather foregoing the need for image-editing software.
So, in order for this program to work, you must first install the Pillow module.
Therefore, you go to your computer's command prompt and once you have the full path specified to the Scripts folder in the Python package you downloaded, enter in, pip install Pillow.
Once this module has been successfully installed, then you now have all the functionality you need in order to perform image manipulation.
Again, with this module, we can rotate images any amount of degrees from 0 to 359.
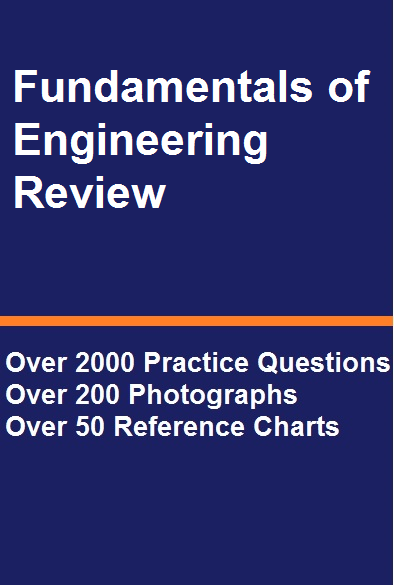
So let's say we have the image shown below.
We are going to rotate this image into many degrees.
Rotating the Image 90° Counterclockwise
Now we are going to rotate the image 90° counterclockwise.
The code to do so is shown below.
Okay, so let's now go through the code.
First, we import the PIL and os modules.
From the PIL module, we import Image.
Then, what you should do is change the current directory to the directory where your images are located. Since I located my images on my desktop, I specified the path to the desktop on my computer. Again, wherever your images are located, you specify this path.
We then create a variable named picture. We set this variable equal to Image.open() and inside of this function specify the image that we want to work with. The image I am working with is examcover.png.
So this picture variable now has the image that we want to work with (and eventually rotate).
We then rotate the image using the rotate() function and inside of this function specify the degrees that you want to rotate the image. We specify 90 to rotate the image 90° counterclockwise. With the rotate() function, the value that you specify in the rotate() function is how much the picture will be rotated counterclockwise. So, the rotate() functions always deals with counterclockwise direction.
After we rotate it, we then have to save the new image. You use the save() function and, as the parameter, specify the filename that you want to save the image as (with this, you must specify the image format, such as .jpg, .png, etc.)
If you want to modify the existing image file, then inside of the save() function, you would specify the original image file you are manipulating (in this case, examcover.png).
If you want to create a new image file, you specify a new image file inside of the save() function. In this case, I created a new image file, examcover_rotated90.png. So, we'll have the original image, along with this newly created image file, which is rotated 90° counterclockwise.
Doing this, gives us the following image.

As you can see, the original image is clipped, so that the title is clipped off. This is because during the rotation, original dimensions of the image, height and width, are preserved. Because of this, an image may be clipped. However, Python has a solution. If we add the attribute, expand=True, the entire image will be preserved during a rotation.
The code to rotate an image and completely preserve it is shown below.
So, now, we rotate the image the same 90° counterclockwise, while preserving the image, so that nothing is clipped off.
So, the image rotated 90° will be like that shown below.

If an image is rotated 90° or 270°, the image and height dimensions are simply switched.
If an image is rotated 180 degrees, you do not need to use the attribute, expand=True. This is because the image is
simply flipped vertically.
Rotating an Image 9° Counterclockwise
You can rotate an image any number of degrees. It doesn't have to be 90°, 180°, or 270°. It can also be something such as 9°.
However, when rotating, an image anything other than 180°, there may be clipping that you may not desire.
To eliminate this, you would use the attribute discussed before, expand=True.
The code to rotate the image 9° without preservation is shown below.
The code above rotates the image 9° counterclockwise without preservation.
This creates the image shown below.

You can see the image is clipped.
Now, the code to preserve the image is shown below.
The code above produces the image without any clipping.
This image is shown below.

Related Resources
How to Randomly Select From or Shuffle a List in Python