How to Run a Go Program with Visual Studio Code

In this article, we show how to run a first Go program with Visual Studio Code.
Visual Studio Code is more than likely the most popular software for running Go code.
Go doesn't have its own IDE; therefore, you must use a third-party IDE in order to execute Go programs. Visual Studio Code is, again, more than likely the most popular software for running Go.
However, in order to run Go, you have to first install the installer package file from the Go website. This package acts to install the underlying compiler for your computer that Visual Studio Code needs to execute a Go program.
Once you have that in place, you should be able to go to the Command Prompt software and type in, go version, and get an output of the current version of your Go software. If you get an error, then Go is not installed on your PC.
So let's go over now how to run a basic go program with Visual Studio Code.
Below is a basic first Go program.
I have saved this program as "firstprogram.go"
Note that Go files end with the .go extension.
To run this program, you enter in the following into your terminal window below the source
code.
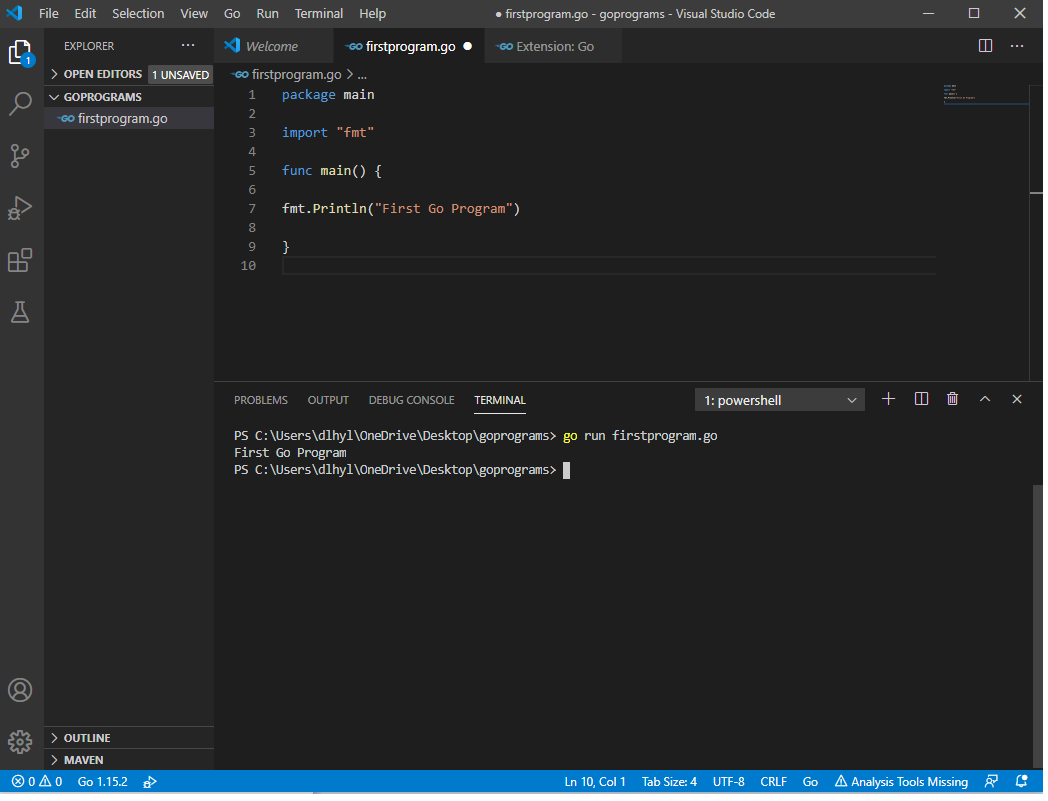
To run a Go program with Visual Studio Code, we type in, go run program_name.go
This is shown in the image below of Visual Studio Code.

So you can see that the program has the resultant output, First Go Program.
We can run Go programs with Visual Basic Code, as long as you have the installer package for Go is installed.
And this how we can run a go program with Visual Studio Code.
Related Resources
How to Check the Version of Go Installed on a Windows PC
