How to Use Callback Functions to Connect Images to Events in Python using OpenCV

In this article, we show how to use callback functions to connect images to events in Python using the OpenCV module.
OpenCV doesn't just allow for static applications. We can use callbacks to connect things such as images and videos to events, so that we can do certain things when certain events are performed.
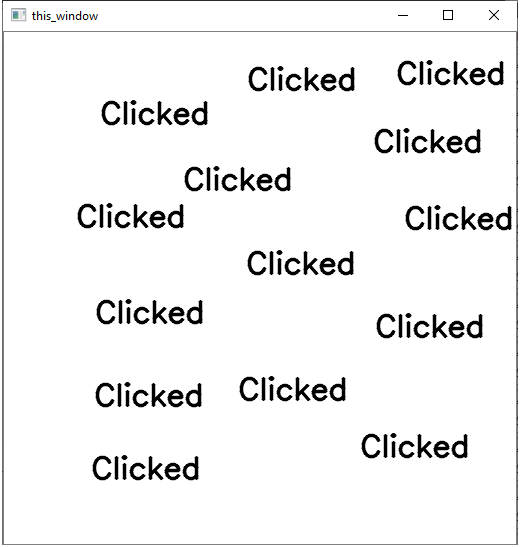
An example is that we show the text, 'Clicked', every time a user clicks inside of a window.
This is what we'll do in our code. Any time a user clicks inside of the window, the text 'Clicked' appears wherever the user clicks.
This is shown in the image below.

To do this, we use a callback function, connect it to an image, which is then connected to a function we create that performs a certain action based on the event that you choose.
In this example, the event we choose is if the user clicks down on the mouse with a left click. When a user performs this event, then the word, 'Clicked' appears where the user clicked.
Below is the full code for this Python program using OpenCV.
Let's now go over this code.
First, we import all the modules we need which is cv2 (OpenCV) and numpy (to create a blank image).
Next, we create a blank white image and store this in the variable, image. This is done using numpy.
Next, we create our custom function, which will perform an action (print 'Clicked') when the user left clicks on the mouse. The name of the function is show_clicked and it takes with it a few parameters.
The first 3 parameters are vital and we use them in this program.
The first parameter is the event. What event on the image that a user takes do you want to trigger an action? There are quite a few events, including left mouse clicks, right mouse clicks, key presses, etc. In this example, we use a left button down click as the event.
The second and third parameters are x and y. x is the x-coordinate and y is the y-coordinate. They track exactly where a user is on the window.
We don't use the flags and param in this program, but they can be used in special circumstances.
So, if the left button down click occurs, then we use the cv2.putText() function to add 'Clicked' to the window, where the user clicks. This is done because the org attribute is set to (x,y).
In order to use a callback function, we must specify the window named using the cv2.namedWindow() function.
Next, to link the callback function with the window and our custom function which prints 'Clicked', we use the cv2.setMouseCallback() function.
We lastly create a loop using a while loop that runs the window
as long as the user doesn't press the Esc key. If the window has been open at least
20ms and the user presses the Esc key, the window closes. The code, 0xFF, stands
for the Esc key.
And this is how to use a callback functions to connect images to
events in Python using OpenCV.
Related Resources
How to Randomly Select From or Shuffle a List in Python
