
How to Create a Menu in JavaFX

In this article, we show how to create a menu in JavaFX.
More than likely, you're very familiar with menus, being that they are used in most types of softwares.
A menu creates a drop-down list if you scroll or click a menu item.
We can add components by specifying the column and row that an item should be placed on a layout.
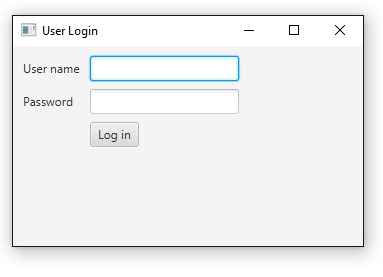
In our program below, we will create a GridPane layout for a login text field, a password text field, and a login button.
We will lay these out using the GridPane layout.
After laying out the components, it will look like the image at the following link: JavaFX GridPane Layout.
The full Java code to create this GridPane layout is shown below.
Below this code, we explain the code in full detail.
So the first thing we do, like in all JavaFX applications, is we import all the packages that are necessary for the code.
After this, we create a public class that extends the Application class. Therefore, the class that we make inherits all the functionality of the Application class.
We then overwrite the start() method. This is the method that is called automatically when we launch the program in the main method.
In this code, we set the stage to a title of "Software Program".
So just to go over some basic terms. There is the menu bar which is the whole bar composed of several menus. One menu is the File Menu, another is the Edit Menu, and so on. The menu bar is the whole top horizontal bar that is composed up of all the individual drop-down menus.
So we create the menu bar. This is created by the line, MenuBar menubar= new MenuBar();
So now we have a menu bar, where we will add the individual menus we create to.
We then create our first drop-down menu. We create a menu named filemenu that is set to a text value of "File".
We then create and add the menu items to this menu. The menu items are the items that you see when you click on the menu. These items forms the elements of the drop-down list.
The first item we add is, "New Project...", then "New File...". We then add a separator in between these items.
Separators are used often in software programs to group similar items in a menu together. This creates better organization and visualization.
We then add "Open Project...", then "Open File...", then another separator, then "Save", then "Save As...", then "Save All", then another separator.
We then create another menu named edit menu with the text, "Edit".
We add the menu items, "Cut", "Copy", and "Paste" to this Edit menu.
We then add the 2 menus, filemenu and editmenu, to the menubar. /Add menu items to menu
We create a BorderPane layout in which we add the menu bar to the top of the BorderPane layout.
We then create a scene named scene 1, in which we add the layout to the scene and make the window width and height of 300px. We then set the scene to the stage and show the stage.
In the main() method, we launch the program.
And this is all that is required to create a menu in JavaFX.
You can add as many menus as you want to the menu bar. In this case, I show only 2 for demonstrations purposes, so the code isn't too long.
Of course we have not added any functionality to this menu so that if you click on any of the menu items nothing will happen.
We will show in a later tutorial how to add functionality to a menu bar in JavaFX.
Related Resources
How to Retrieve Data from a Text Field in JavaFX
How to Retrieve Data from a Radio Button Group in JavaFX
How to Retrieve Data from a Group of Check Boxes in JavaFX
How to Retrieve Data from a ChoiceBox in JavaFX
How to Retrieve Data from a ListView
How to Check if a Text Field is Empty in JavaFX
How to Select an Item By Default in JavaFX
How to Disable a Button After It's Clicked in JavaFX