
How to Build a Countdown Timer Circuit with an Arduino
In this project, we will go over how to build a countdown timer circuit with an arduino microcontroller.
A countdown timer circuit is very useful when you need an electronic device for a timing application.
Common examples of devices that use countdown timing applications are ovens, microwaves, and toasters.
So if you put a microwave on for one minute, it will start at the one minute and then count down, 1 second at a time, until it reaches 0 and then it shuts off.
So countdown applications are very useful in cases such as these.
With an arduino microcontroller, we can easily implement a countdown timing application. Just like a microwave where you can input the amount of time you want it to be on, with an arduino, we can input the amount of time we want countdown to last for.
All of this is done in programming. We will show the code that is necessary in order to achieve a count down timing effect.
Components Needed for the Countdown Timer Circuit
- Arduino microcontroller
- LED
All we need is the arduino micrcontroller and one load device. Since an LED
is probably the simplest to operate, we will use it in this case. However, if you have any other
device that you want as the output, then you can definitely use this.
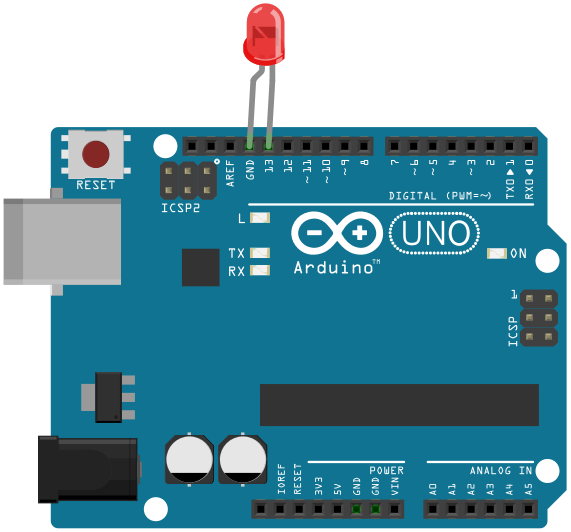
Countdown Timer Circuit with an Arduino
The schematic for the countdown timer circuit is shown below.
Code
The code to turn on an LED until the timer reaches 0 is shown below.
int i;
const int LED= 13;
void setup()
{
pinMode(LED, OUTPUT);
Serial.begin(9600);
}
void loop()
{
i= Serial.parseInt();
while (i != 0) {
for (i; i>0; i--){
Serial.println(i);
delay(1000);
digitalWrite(LED, HIGH);
}
if (i==0)
{
Serial.println("END");
digitalWrite(LED, LOW);
}
}
}
Here in this code, we first declare the variable i and the LED variable. Placed before the setup() function, the variable i is a global variable, so this means it can be used in any function in the entire code. The LED variable is declared as a constant integer, meaning it doesn't change integer value. It is initialized to a value of 13 because the anode of the LED will be connected to digital pin 13.
Next, we have the setup() function. In this function, we declare the LED as an output. We also create a serial monitor with a baud rate of 9600; this allows us to see our program in the serial monitor.
Next, we have the loop() function. In this function, we read in an integer value using the Serial.parseInt() function.
We use a while loop that overshadows the for loop. As long as the value of i is not equal to 0, the loop is operational. When i reaches the value of 0, then the loop stops looping. And all function stops. The while loop is important. Without the while loop, once the loop reaches 0, it would print the "END" statement over and over again.
Within the while loop is a for loop. This for loop is the heart of the countdown mechanism. The for loop starts at whatever value the user inputs. This really can be any value. Then it counts down by 1 until it reaches 0. So if a user enters 60, it starts at 60 and goes to 59,58,57, 56,55...3, 2,1, END.
The Serial.println(i) prints out each value of i.
The delay(1000) function is what gives a 1-second delay between each count down. Without this delay function, the countdown would be over rapidly. It wouldn't give the same simulation as a real 1-second countdown, as you would find in a device such a microwave. So this delay is very important.
While the countdown is occurring, which is while i is not equal to 0, our output device, which in this case is an LED, will be ON.
Once i reaches 0, then we print the statement "END" and the output device shuts off.
And this code really simulates an actual electronic device you would use that operates as a countdown timer such as a microwave.
A user can input the amount of time s/he wants the device to operate and then it counts down 1 second at a time until the time has expired.
Related Resources
How to Build a Stopwatch Circuit with an Arduino