How to Build a Stopwatch Circuit with an Arduino
In this project, we will go over how to build a stopwatch circuit with an arduino microcontroller.
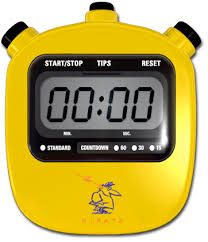
A stopwatch is a watch that can count the number of seconds that has passed from the start of something to its end.
A stopwatch will always have 2 buttons or modes, a start and a stop mode. It may have other features but it will always have these.
The start mode starts the stopwatch off. The stopwatch always starts at 0 seconds and counts up each second. So it goes from 0, 1, 2, 3...
The stop mode ends the stopwatch count. So if we go into stop mode when it reaches 7 seconds, the end time is 7 seconds.
Using an arduino microcontroller, we will create a stopwatch using a single toggle switch. When the switch is in a HIGH state, the switch will be in start mode and when the switch is a LOW state, it is in stop mode. By turning the switch HIGH, we start the count. By turning it LOW, we end the count.
A stopwatch is used in any application where timing needs to be done. This could be for anything such as taking a person's pulse, timing an event such as a race, or any other such application.
We show how to build the circuit below.
Components Needed for the Countdown Timer Circuit
- Arduino microcontroller
- Toggle switch
All we need is the arduino micrcontroller and a toggle switch.
The toggle switch has 3 terminals.
The pinout for the toggle switch is shown below.
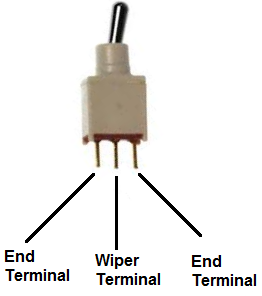
The 2 terminals at the ends are the end terminals. To these we either attach the positive terminal or the ground of the power supply.
The middle terminal is the wiper terminal. The value of the wiper terminal will change depending
on which side the toggle switch is turned to. If it's turned to the side that is connected to the positive voltage
supply, it will HIGH. If it's turned to the side connected to ground, it will be LOW.
Stopwatch Circuit with an Arduino
The schematic for the stopwatch circuit is shown below.
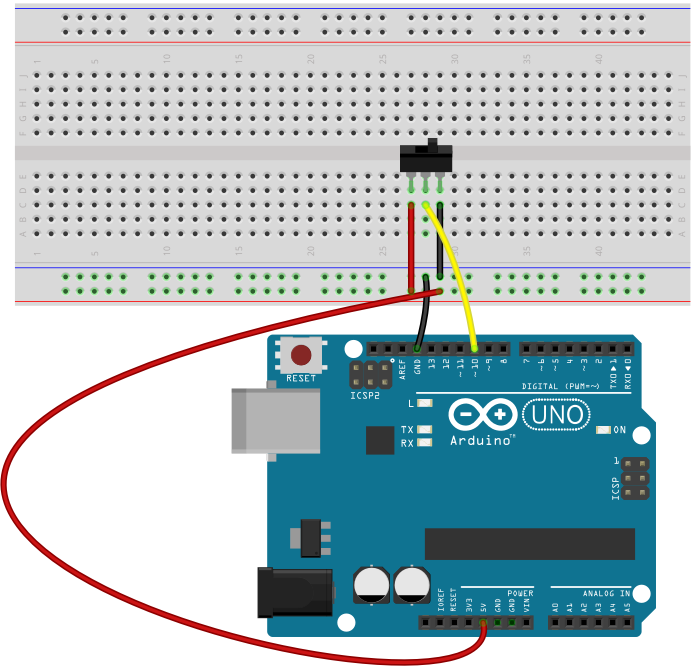
This is a pretty basic circuit that uses an arduino along with a single external component, a toggle switch.
The toggle switch is a 3-terminal device. One end gets connected to the positive voltage supply. The other end gets connected to ground. And the wiper terminal connects to digital pin 10 on the arduino board.
Code
The code to have a stopwatch start and stop with a single toggle switch is shown below.
const int toggleswitch= 10;
int value;
int i=0;
void setup(){
Serial.begin(9600);
pinMode(toggleswitch, INPUT);
}
void loop(){
value= digitalRead(toggleswitch);
if (value == HIGH){
for (int i=0; i >= 0; i++){
Serial.println(i);
delay(1000);
}
}
}
In the first block of code, we initialize 3 variables, toggleswitch, value, and i. The toggleswitch variable is initialized to 10 because the toggle switch is connected to digital pin 10. The value variable is declared. This will hold the value of the state of the toggle switch- either HIGH or LOW. We declare and initialize the variable i, because we will need to use it in a for loop. We initialize i to the value of 0 because our count starts at 0.
The next block of code is the setup() function. In this function, we include the Serial.begin() function and put the value of 9600 in it. This is so that we can see and monitor the value that the stopwatch is counting to in the Serial Monitor. The next line makes the toggle switch an input. It is an input because the value of the toggle switch is an input; it's not an output.
The next block of code is the loop() function. In this function, we have an if statement. If the switch is HIGH, meaning switched HIGH, then the for loop is activated. The for loop begins at the count of 0. It then counts up 1 each second, so it goes from 0, 1, 2, 3...until switched off by turning the toggle switch LOW. The delay(1000) function allows a 1-second delay between each number, so that it's a 1-second gap between each count. Without the delay function, the count could much faster than seconds. A delay of 1000 means 1000 milliseconds, which is equal to 1 second.
And this is all the code that is needed to simulate a stopwatch.
Related Resources
How to Build a Countdown Timer Circuit with an Arduino