
How to Create an Image Uploader with Python in Django

In this article, we show how to create an image uploader with Python in Django.
An image uploader is a form in which a user can upload images. It is very popular and widely used on the internet, such as through sites like facebook where a user uploads profile pictures. It's used on youtube to upload videos of images for a video or the channel's brand image. So image uploaders are all over the web.
We will create an image uploader that looks like the form below, but the form below
does not have any functionality.
So how do we create this in Django?
There's a couple steps needed to create this project.
We're assuming that you want to save this image to a database so that you can permamently save it.
So we take the approach in this article that all images uploaded are saved to a database in Django.
Of course, the images themselves aren't saved to the database, just the pathway to the image. The images are stored in the media directory of the project (website).
So let's start from the beginning and go step by step on how to create an image uploader in Django.
Realize that in order to upload images in Django through use of the ImageField, you must download the Pillow module. This can be done
by the line, pip install Pillow.
Create the media Directory
The first thing you should do is create a media directory in the root project directory of your website.
Django wants you to have 2 directories on your website for static files, such as images and videos.
One directory is the static directory. This directory holds static files that you, as the webmaster, put on your site.
The other directory is the media directory. This directory holds static files that an outside user (not the webmaster) uploads to the site.
Django differentiates the 2 for organization as well as probably for security reasons. Being that you don't really know what a user uploads to a site, it should contained in a separate directory.
So, again, you create a media directory in the project root directory.
settings.py File
So first, in order to upload files such as images in Django, you have to make changes to the settings.py file.
So we just created the media directory in the root directory of the project.
In this article, we'll go over what needs to be added to the settings.py file and why.
So, let's just get directly into it.
So, since we're creating another directory, media, we have specify the path to this media directory, so that Django knows where it is.
So, the following must be added to the settings.py File.
So, since we're creating another directory, media, we have specify the path to this media directory, so that Django knows where this folder is located.
And MEDIA_URL is for scripts or various files in templates, so that when we reference MEDIA_URL, the script knows where this directory is.
Besides these 2 lines, there's one other line we should add to the settings.py File and this in TEMPLATES set in the OPTIONS dictionary.
You want to add the following line to the OPTIONS dictionary, 'django.template.context_processors.media' What this does is it allows you to reference the MEDIA_URL variable in template directories.
So the OPTIONS dictionary should look like the following.
So, this concludes all the changes we need to do in the settings.py file for file uploads in Django.
urls.py File
Now we have to make one change to the urls.py file in the project directory.
To the urls.py file in the project directory, we need to append the following to the urlpatterns list.
We also need to add the following import statements to the top of the urls.py file.
So the full urls.py file should look something like the following, shown below.
And these are all the changes that need to be made to the urls.py file in the project directory.
Creating the Database Table
Again, we assume that you want to put the uploaded information, such as the name of the image, publish date, the pathway to the image in a database, so that it can be permanently stored.
Therefore, we create a database table to do this in the models.py file.
So below we create a database table called Image.
So we create a database table called Image.
We make it very simple.
We simply have name and imagefile columns.
name represents the name of the image.
imagefile represents the pathway to the image.
We upload the file to the images directory within the media directory. We set null equal to True. And we give the field of verbose_name of "", because we don't want the name of the field appearing next to the image upload button.
We then create a __str__ function just so that a generic Object isn't returned when calling an image object.
Just remember that now that you have created the database table in the models.py file, you have to do all migrations, including
makemigrations and migrate.
Creating the ModelForm
So next we create the ModelForm in the forms.py file.
The ModelForm in Django is a form based off of the database table that we have just created.
We create a ModelForm called ImageForm.
This is shown in the code below.
So the ModelForm is very basic. Django does that on purpose.
We create a ModelForm called ImageForm
In the class Meta, we set the model equal to the name of the database table we are creating this form based off of.
We then put the fields that we want to include in the form, which are both fields from the Model, including "name" and "imagefile".
views.py File
Next, we go to the views.py File.
Basically in the views.py file, we want to take the ModelForm that we've created and pass it through the template file that we are rendering.
Okay, so let's go over this code.
So we're rendering a template; therefore, we import render from django.shorcuts.
We import Video from .models, because in this case, we want to get the last image that has been uploaded, so that we can show in our images.html template file.
We import the ModelForm that we created in the forms.py file, so we import ImageForm from the forms.py file.
We then create our function-based view, showimage()
We create a variable, lastimage, which is the last image (object) in the database table.
We then create a variable, imagefile, which contains the file pathway to the image.
We then create a variable named form and set it equal to the ImageForm (which is the ModelForm we created for the video upload form). Inside of the parameters we put, (request.POST or None, request.FILES or None). request.POST or None makes the data be retained in the field after a user has submitted the form. It also doesn't raise validation errors when the page is first loaded. request.FILES or None allows the files to submitted to a database in Django. This is absolutely necessary in order to upload any files in Django such as images.
We then create the context dictionary which contains the variables, imagefile and form.
We then render the template, images.html, passing into the context dictionary.
template File
So lastly, we have the template file, which is the file that contains the image upload form, where a user can upload an image from.
So this is actually the image upload file.
Everything that was done prior has led up to this file being possible.
So let's go through the contents of this file now.
So let's go through the contents of this template file now.
So we have our typical HTML head tag.
We'll start at the HTML body tag.
The first thing we have in this body tag is the h1 tag, Image Uploader.
We then have our form tag. Because this is a form involving file uploads, we must have, enctype="multipart/form-data"
We set the method equal to "POST" and the action attribute equal to "". method is set equal to "POST" because we want the data posted to this form. Because we want the data to remain on this form, we set the action attribute equal to ""
To prevent cross site request forgery with forms, Django requires the use of the line, {% csrf_token %}, in all forms, or else an error will be caused.
We then must add the submit button the form, which we give a value of "Upload"
We then close the form.
Underneath this form, we display the image using the HTML img tag.
Running the above code gives us a page such as that seen below.
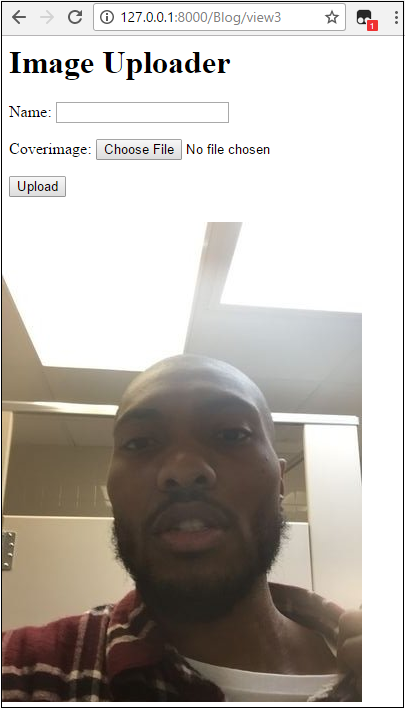
And this is all that is needed to create an image uploader form with Python and Django.
Related Resources
How to Create a File Uploader with Python in Django
How to Create a Video Uploader with Python in Django