
How to Run a node.js Script with Visual Studio Code
In this article, we show how to run a node.js Script with Visual Studio Code software.
Visual Studio Code is a very popular and used software to run node.js scripts.
In this article, we will create a very basic node.js script.
What we want to do is just go through the process of how to run a Script successfully.
So what you need to do is open up the Visual Studio Basic Software
You then want to create a Open up the Tab, New File.
You can call this file any name you want but the file needs to have .js file extension.
Remember that node.js scripts are Javascript files. node.js are Javascript files run on the server side; however, just like plain Javascript, which is run on the front end, node.js scripts are Javascript files. Therefore, they must end with the extension .js.
So, you can save this file as firstprogram.js
Next, in this file, place in the following code.
So this is a simple script that will output the string when it runs in the terminal successfully.
So the first thing you put do is click on the Terminal tab at the bottom of the software. If you can't find this, go to the top panel and click on the Terminal tab and Select New Terminal.
When the Terminal is open, it should look like the following
shown below.
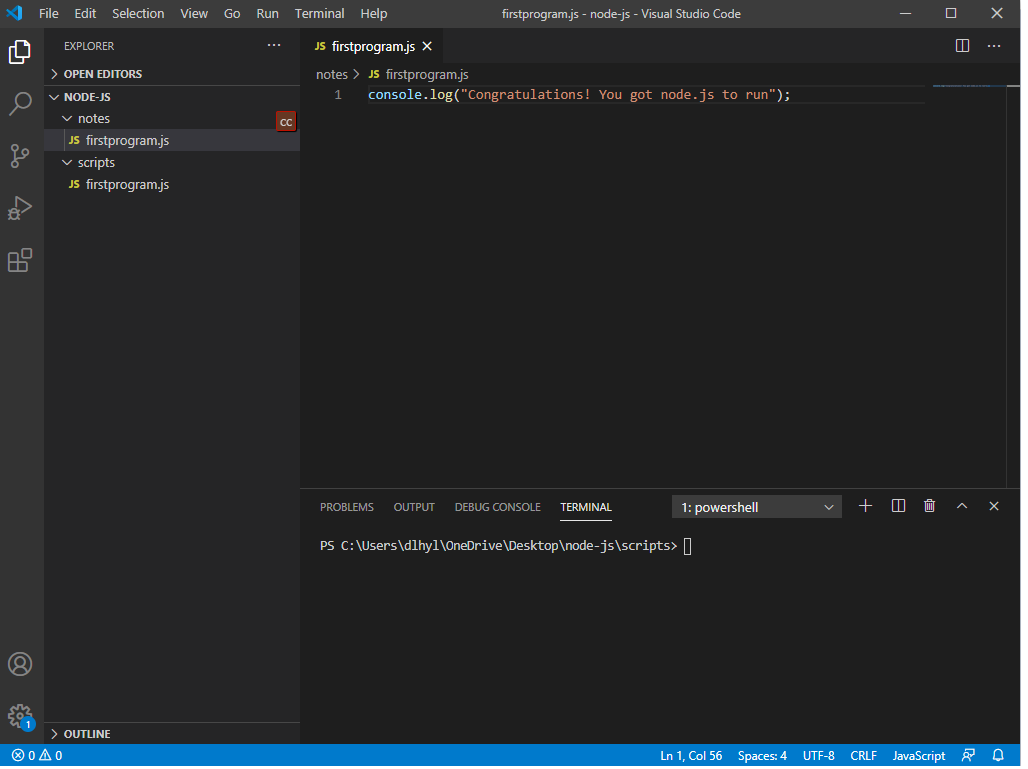
Next make sure that the file that you want to run is within the directory that you're in on the terminal.
You can see in the terminal above, the current working directory is the notes directory. This is the directory which contains the file that we want to run. Therefore, the path is correct. If it wasn't, then you have to manually adjust it, such as by using the cd command.
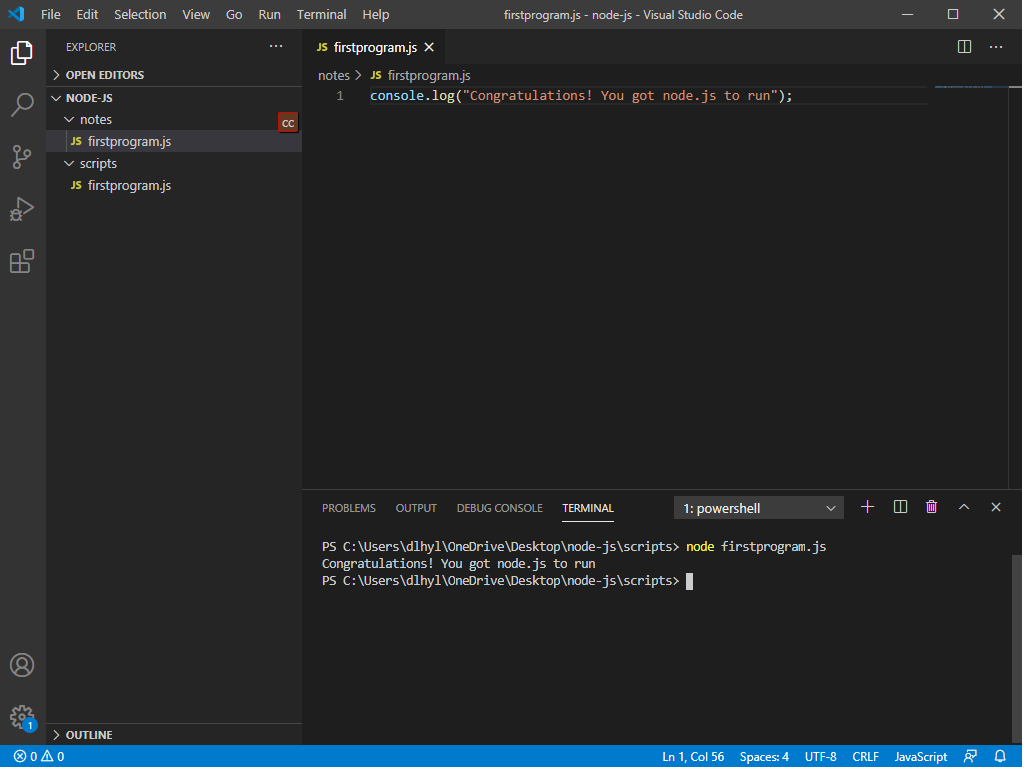
After this, in the terminal, you specify the following.
So in order to run a script in node.js, you must specify the word, node, followed by the name of the file, including the file extension, which will be .js with node.js.
This will execute the node.js script.
Once you do so, you should see the output, "Congratulation! You got node.js to run"
This is shown in the terminal below.
And this is it. You have officially run a node.js script in Visual Studio Code.
Remember that in order to run a node.js script in Visual Studio Code, you do so through the terminal near the bottom of the software.
You make sure that you are in the correct directory and then you use the word, node, followed by the filename you want to run.
This will run the node.js script.
And this is how to run a node.js script with Visual Studio Code
software.
Related Resources
How to Find the Version of node.js Installed on Your Computer