
How to Build an Infrared (IR) Phototransistor Receiver Circuit
In this project, we show how to build a simple infrared (IR) receiver circuit using an infrared (IR) phototransistor.
This is a circuit which can receive and detect infrared light.
An infrared (IR) phototransistor is a transistor that can only trigger on with infrared light.
How a phototransistor works is it has 2 terminals, an emitter and collector. It does not have a terminal connection to its base. The base is simply made up of infrared light-sensitive material. In a regular transistor, current or voltage needs to be applied to the base in order for the transistor to turn on and conduct. With an IR phototransistor, only infrared light will allow the transistor to turn on. Without infrared, the transistor will not turn on.
To build an infrared receiver circuit, we will need the following electronic components:
Components Needed
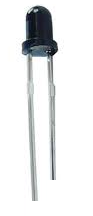
- IR Phototransistor
- 470Ω Resistor
- LED
- 3V or 2 batteries
Here you can find a wide variety of IR phototransistors at Jameco.
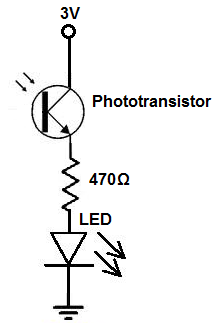
The circuit we will build from these parts is:
Infrared Receiver Circuit
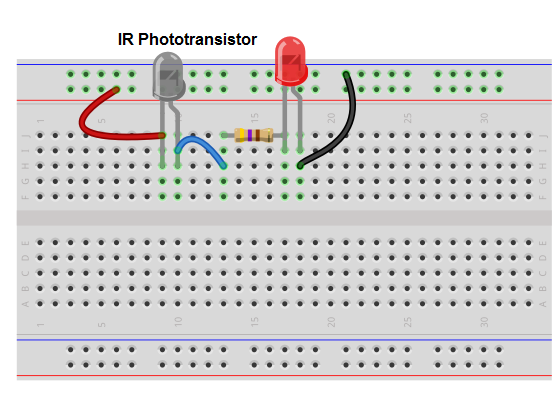
The above circuit shown on a breadboard is shown below.
This circuit is very simple.
When the IR phototransistor isn't exposed to any infrared light, there can be no current flow through the transistor, because infrared light is what produces base current in the transistor. The base current then allows and triggers a much larger current to flow from collector to emitter. Without infrared, there is no base current. Therefore, no amplified current can be produced from collector to emitter.
So if you expose the IR phototransistor to an infrared light source such as an infrared LED, a TV remote control, a flame, or sunlight, the LED will light up, assuming that the infrared light is of the wavelength that the IR phototransistor is designed to detect. This is because the infrared induces a base current in the transistor, which causes sufficient current amplification to drive and light the LED.
And this is how an infrared receiver circuit can be built with an IR phototransistor.
Testing the Circuit
Again, when testing this circuit, the sunlight will probably make this circuit work, since the sun emits infrared light, as do flames as well. But the best way to produce the infrared light is through an infrared LED which emits the specific wavelength that the IR phototransistor can detect. Meaning, if we have a 940nm IR phototransistor, we must use a 940nm IR LED to test the circuit. LED.
An infrared LED is an LED which emits infrared light. We cannot see infrared light, because it's outside of the visible spectrum, which is why we build circuits to be able to detect it. Infrared LEDs can be found at and many more online retailers. Ebay is a good place to get them in a pack for a cheap price. Like other LEDS, the cathode lead is shorter than the anode LED, so it connects the same way in a circuit as you would a regular LED.
To produce infrared LED from an IR LED, you just give the LED sufficient voltage and it will emit infrared light.
Just place the DC power which the LED needs for power. Check the datasheet of the IR LED in use to find out how much voltage it needs; this will be called the forward voltage on the datasheet.
Also check the maximum forward current listed on the datasheet and use a resistor to make sure the LED does not
receive more than this specification; this is to make sure the LED doesn't burn out due to excess current.
Once the LED is supplied with the sufficient current, it will emit infrared light. With it emitting IR light,
now just point the IR LED to our Infrared (IR) receiver circuit. This will trigger the LED to light in the circuit.
And, thus, our test will be complete.
To see the project where we have built an IR LED circuit, see the IR LED Circuit project here.
Related Resources
How to Build a Proximity Detector Circuit
How to Build a Dark-activated Light Circuit