
How to Draw a Rectangle in Python using OpenCV

In this article, we show how to draw a rectangle in Python using the OpenCV module.
OpenCV allows a user to create a wide variety of shapes, including rectangles, squares, circles, etc.
Python has a built-in rectangle() function, which allows us to add a rectangle to an image, usually a blank one. We create this blank image with numpy. Then using OpenCV, we add our rectangle shape.
There are many parameters that go into the rectangle() function, which allow us to control various aspects of it.
This includes its location (where it is on the blank image such as to the left, to the right, middle, upper, lower, etc.). It also includes its size, color, border thickness, and whether it's filled or unfilled.
In this article, we're going to create 2 types of rectangles,
one where the center is unfilled and one where the center is filled.
How to Create an Unfilled Rectangle
So the first type of rectangle we will create is one where the center is unfilled.
The rectangle we will create is shown below.

The code to create this rectangle which is shown above is
shown below.
Let's now go over this code.
First, we import all the modules we need which is cv2 (OpenCV), numpy (to create a blank image), and matplotlib (to get grided axes).
Next, we create a blank white image and store this in the variable, whiteblankimage. This is done using numpy.
We now have a blank image (like a canvass) in which we can now draw our rectangle shape.
Next, we use the cv2.rectangle() function to create our rectangle on this white blank image.
The first parameter that we must feed into the cv2.rectangle() function is the image we want to draw it on. We will be using what we created with numpy, whiteblankimage. This provides a perfect clean white background, in which we can place our rectangle shape.
The second parameter we must specify is where the rectangle starts. pt1 represents the upper left border of the rectangle. We want our rectangle, in this example, to begin at the point, (100,200). If you're not sure where to begin, show the blank image with grids first before beginning the rectangle. Then you can see the dimensions of where you want this image to start and end.
The third parameter we must specify is where the rectangle ends. pt2 represents the lower right border of the rectangle. We want our rectangle, in this example, to end at the point, (400,300).
Next, in the fourth parameter, we must specify the color of the rectangle. We specify the color with the RGB format. Since in this example our rectangle is blue, this is represented by (0,0,255).
In the last parameter, the fifth parameter, we specify the thickness
of the border of the rectangle. In this case, it's 10, which is relatively thick
for a border.
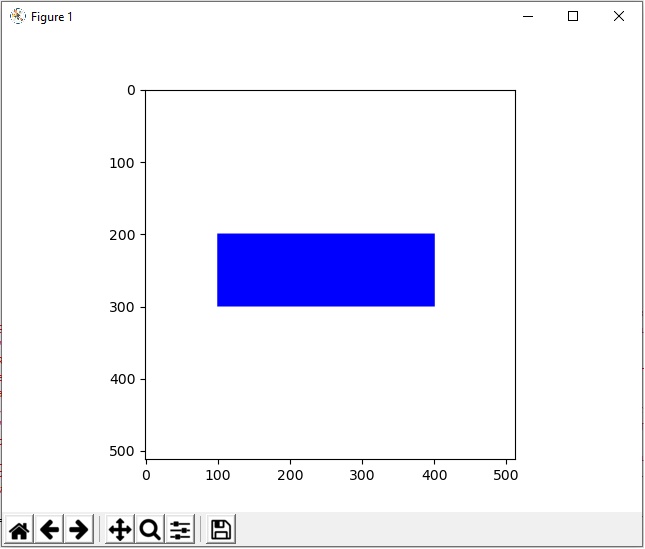
How to Create a Filled Rectangle
Next, we show how to create a rectangle whose interior is filled.
With no dimensions changed from the first image, the only change
being that the interior is filled with color, this produces the following
image shown below.
The only difference between this rectangle and the other unfilled rectangle shown earlier is this rectangle is the thickness parameter of the cv2.rectangle() function.
To make a filled rectangle or any shape in Python, set the thickness attribute to -1.
The full code to this is shown below.
And this is how to draw a rectangle, unfilled or
filled, in Python using the OpenCV
module.
Related Resources
How to Draw a Square in Python using OpenCV
How to Draw a Circle in Python using OpenCV
How to Draw a Line in Python using OpenCV
How to Add Text to an Image in Python using OpenCV
How to Display an OpenCV image in Python with Matplotlib
How to Use Callback functions to Connect Images to Events in Python using OpenCV
How to Check for Multiple Events in Python using OpenCV