
How to Use a Charged Capacitor to Light an LED

For this project, we are going to charge a capacitor with voltage and then have the capacitor act as a temporary power source for the circuit. After we charge the capacitor with the battery, we're going to disconnect the battery from the circuit. The capacitor will then act as the power source, giving current to the LED so that the LED remains on, though not being powered anymore by the battery.
When the capacitor acts as the power source, it dumps its voltage much quicker than a battery does so the LED is on only for a short period of time. However, nonetheless, it still gives power to the LED so that it can remain on. This can have great real-life application in which there is a very brief shut-down in power, for instance, if the power goes out for a few seconds and then turns back on. While the power is off, the LED or whatever desired load needs to be kept on can remain on if there is a capacitor acting as a backup power source.
Components Needed
- A 9-volt Battery
- 1N400X Power Diode (this part is optional)
- A Pushbutton
- 470Ω Resistor
- 1000µF Capacitor
- An LED
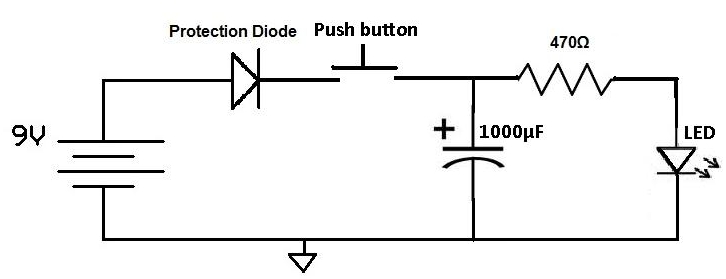
This is the schematic below for the circuit that we're going to build:
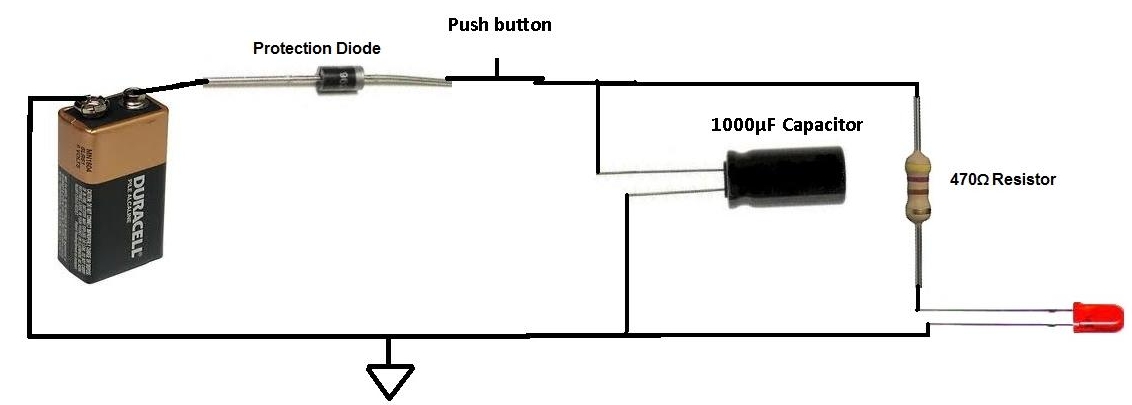
This now is a more real life like representation of the schematic:
When the button is pressed down, closing the circuit, the battery does two jobs: it charges the capacitor up with voltage and it gives power to the LED, lighting it. Once the battery is on for enough time for the capacitor to be fully charged up to 9 volts, the capacitor cannot retain any more charge. This happens in a matter of seconds. The battery, however, keeps powering the LED.
Now remove your finger from the pushbutton so that the circuit is now open. Now the battery is disconnected from the circuit, and thus can no longer power the LED. However, the LED still remains on for an extended period of time after even though the battery is disconnected. This is because the capacitor now acts as the (temporary) power source for the circuit, giving power to the LED, so that it stays on for a short while. A capacitor does not act like a battery, because it dumps its charge very quickly, so that the LED only receives power for a few seconds. However, if a power source goes out for a while, the capacitor can act as a temporary power source. The larger the capacitor used, meaning the greater the charge it can store, the longer it can power a device, though it takes longer to charge. If we used a 2000µF, it could power the LED for double the time, being that it can store more charge, and if we used a 4000µF, it could power the LED for 4 times longer, being that it has quadruple the charge capacity.
For this project, we chose to power an LED. But it can be any load, an electric motor, a toaster, an oven...
To see this circuit work in real life, see the following video below.
Related Resources
How to Build a Dark-activated Light Circuit
How to Build an LED Driver Circuit
How to Build an LED Flasher Circuit
How to Build a Blinking LED Circuit